
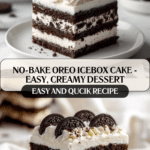
No-Bake Oreo Icebox Cake Recipe
Introduction
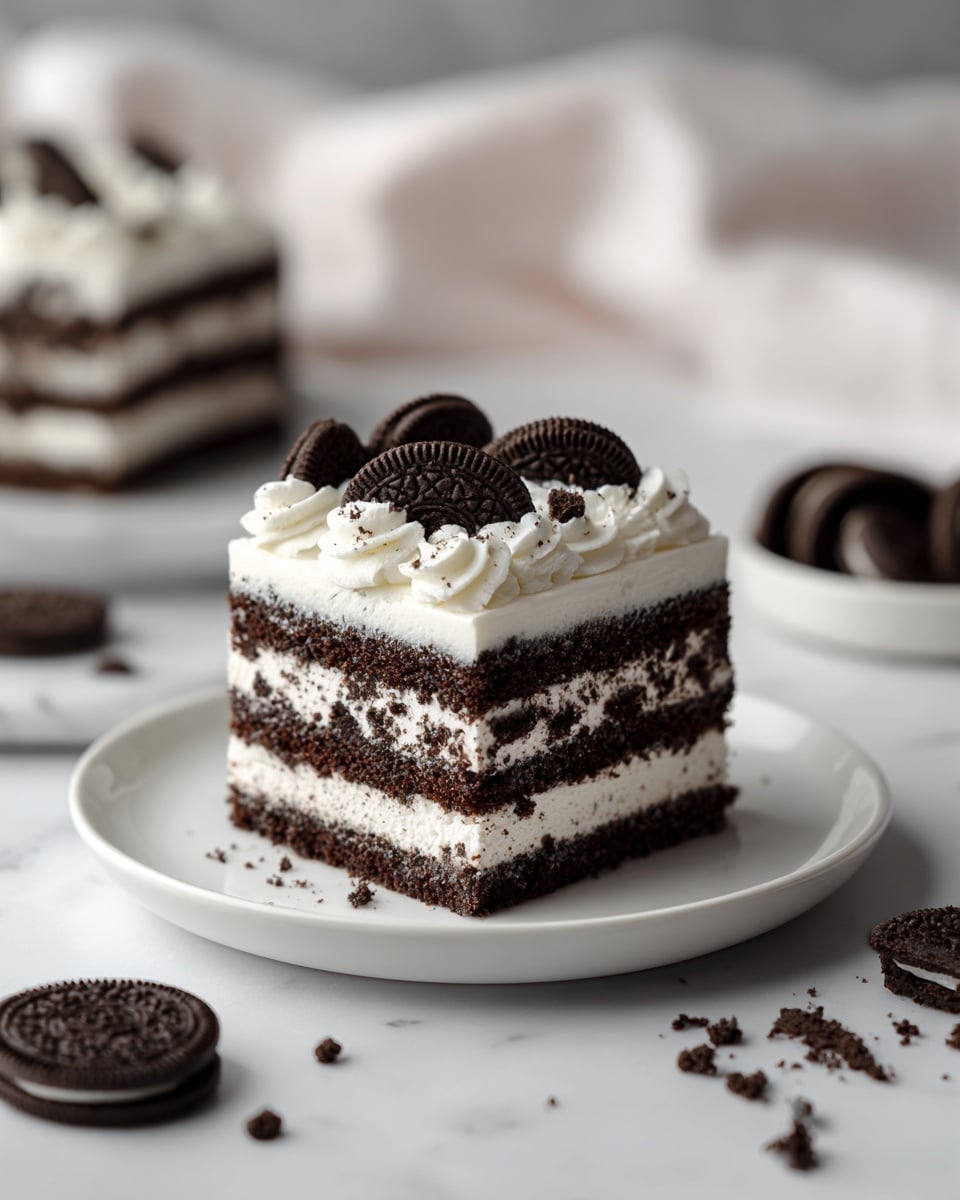
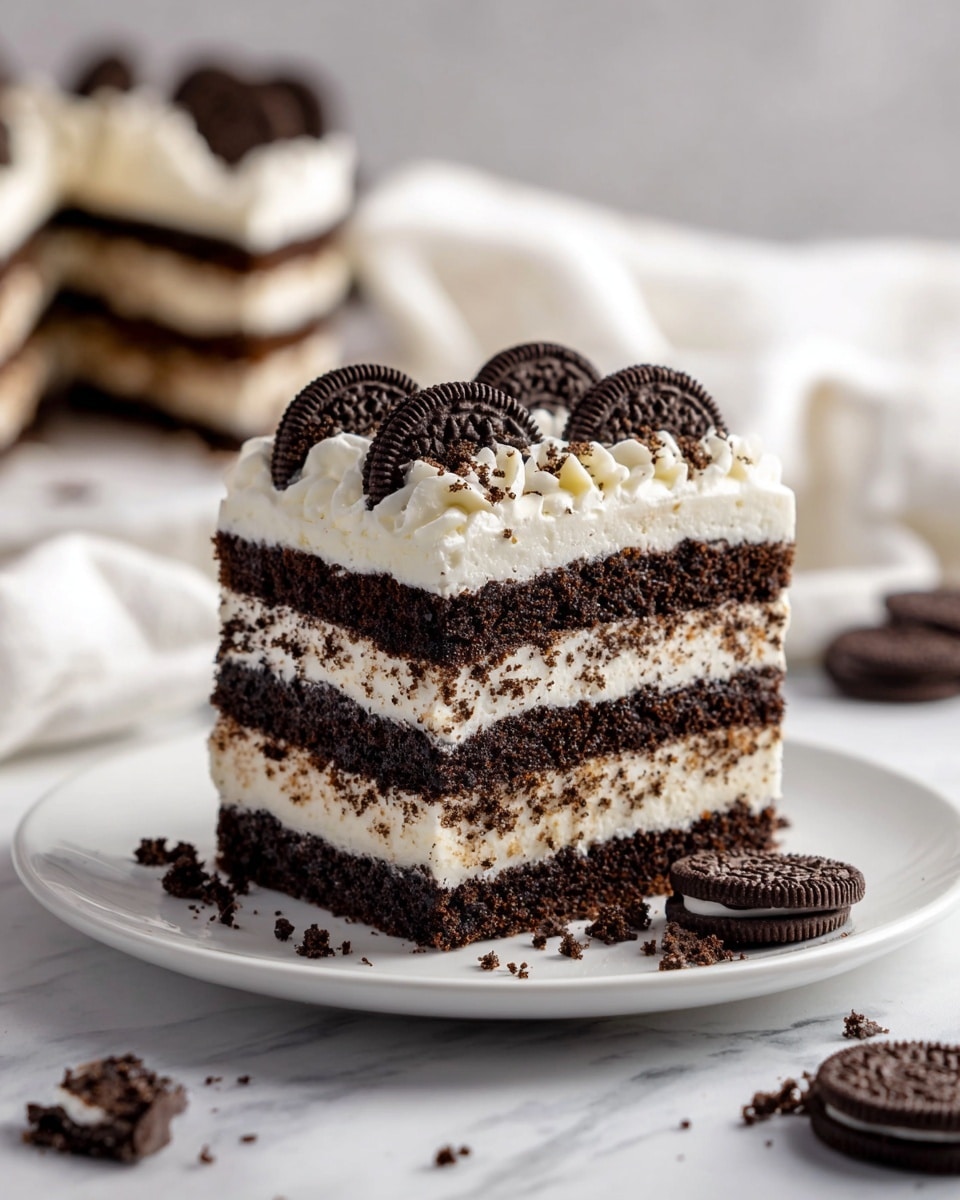
This no-bake Oreo icebox cake is a cool, creamy dessert that’s perfect for warm days or casual get-togethers. Layers of whipped cream and classic Oreo cookies create a satisfying texture and sweet flavor. The cookies soften as they chill, turning each bite soft and cake-like with a smooth, fluffy cream.
Ingredients
- 50 Oreo cookies (regular, not double-stuffed), plus more for topping
- 3 cups (710 ml) heavy whipping cream, cold
- ¾ cup (90 g) powdered sugar
- 1 tsp (5 ml) vanilla extract (optional)
Instructions
- Step 1: In a large chilled bowl, pour in the cold heavy whipping cream. Add the powdered sugar and vanilla extract (if using) to the cream.
- Step 2: Using a hand mixer or stand mixer, whip the cream on medium-high until stiff peaks form.
- Step 3: On a clean surface, lay out about half of the Oreo cookies in a single layer.
- Step 4: Spread a generous layer of whipped cream over the cookies.
- Step 5: Add another layer of Oreos on top of the cream, followed by more whipped cream. Continue layering until all cookies are used, ending with a whipped cream layer.
- Step 6: Spread the remaining whipped cream evenly on the top and sides.
- Step 7: Crush a few extra Oreo cookies and sprinkle them on top for garnish.
- Step 8: Cover and refrigerate for at least 4 hours or overnight so the cookies soften and the cake sets.
- Step 9: Slice or scoop to serve chilled.
Tips & Variations
- Use regular Oreos rather than double-stuffed for the best texture balance.
- Chill your mixing bowl and beaters before whipping the cream for easier, firmer peaks.
- For extra flavor, fold a tablespoon of cocoa powder into the whipped cream before layering.
- Add a layer of fresh berries between the cookies and cream for a fruity twist.
Storage
Store the icebox cake covered in the refrigerator for up to 3 days. Re-chill the cake before serving if it has softened too much. Avoid freezing, as the texture of the whipped cream and cookies will change when thawed.
How to Serve
Serve this delicious recipe with your favorite sides.
FAQs
Can I use a different cookie instead of Oreos?
Yes, you can substitute other sandwich cookies with a similar texture, but classic Oreos provide the best balance of creaminess and chocolate flavor.
How long should I refrigerate the cake before serving?
Refrigerate for at least 4 hours or overnight. This allows the cookies to soften and the flavors to meld, resulting in a cake-like texture.
Print
No-Bake Oreo Icebox Cake Recipe
- Total Time: 4 hours 15 minutes
- Yield: 3–4 servings 1x
Description
This no-bake Oreo icebox cake is a cool, creamy dessert perfect for warm days or casual gatherings. Layers of whipped cream and classic Oreo cookies soften as they chill, creating a luscious, cake-like texture with a satisfying balance of rich cream and crunchy chocolate cookies. Easy to prepare without the need for baking, it’s an impressive and fuss-free treat that’s sure to delight.
Ingredients
Cookies
- 50 Oreo cookies (regular, not double-stuffed), plus more for topping
Cream Mixture
- 3 cups (710 ml) heavy whipping cream, cold
- ¾ cup (90 g) powdered sugar
- 1 tsp (5 ml) vanilla extract (optional)
Instructions
- Prepare the Whipped Cream: In a large chilled bowl, pour the cold heavy whipping cream. Add the powdered sugar and vanilla extract if using. Using a hand mixer or stand mixer, whip the cream on medium-high speed until stiff peaks form, making sure it holds shape and is light and fluffy.
- Lay Out the First Cookie Layer: On a clean surface, arrange about half of the Oreo cookies in a single layer, ensuring they are closely placed to create an even base for the cake.
- Add Whipped Cream Layer: Spread a generous layer of the freshly whipped cream over the cookie layer evenly, covering all the cookies to bind the layers together.
- Build Additional Layers: Place another layer of Oreos over the whipped cream, then spread more whipped cream over them. Continue alternating layers of Oreo cookies and whipped cream until all cookies are used, finishing with a layer of whipped cream on top.
- Finish the Cake: Smooth the remaining whipped cream evenly over the top and the sides of the cake for a polished look. Crush a few extra Oreo cookies and sprinkle them over the top as garnish for added texture and visual appeal.
- Chill the Cake: Cover the cake tightly with plastic wrap or a lid and refrigerate it for at least 4 hours or preferably overnight. This chilling time allows the cookies to soften and the cake to set, resulting in a cake-like texture.
- Serve: Once chilled, slice the icebox cake or scoop portions to serve. Enjoy this cool, refreshing, and creamy dessert immediately.
Notes
- Use regular Oreos, not double-stuffed, for best texture and balance.
- Chilling the cake overnight yields a softer, cake-like consistency as the cookies absorb moisture from the cream.
- For a thicker whipped cream, ensure the cream and mixing bowl are well chilled before whipping.
- Vanilla extract is optional but adds a subtle depth of flavor to the whipped cream.
- This dessert is best served chilled and consumed within 2 days for optimal freshness.
- Prep Time: 15 minutes
- Cook Time: 0 minutes
- Category: Dessert
- Method: No-Cook
- Cuisine: American
Keywords: No-Bake, Oreo, Icebox Cake, Dessert, Easy, Whipped Cream, Cookies, Cold Dessert

