
Sandwich Bread Recipe
If you’ve ever dreamed of biting into perfectly soft, fluffy, and slightly sweet bread that holds together your favorite fillings just right, then this Sandwich Bread recipe is about to become your new best friend in the kitchen. With simple pantry staples and a straightforward method, this Sandwich Bread transforms everyday ingredients like bread flour, honey, and butter into a heavenly loaf that’s as comforting as a warm hug. It’s the kind of bread that invites you to make sandwich masterpieces, toast up for breakfast, or just enjoy a slice fresh from the oven with a smear of butter. Let me take you through every delightful step of making this beloved Sandwich Bread from scratch, so you never have to settle for store-bought again.
Ingredients You’ll Need
Each ingredient in this Sandwich Bread recipe is carefully chosen for its role in crafting the perfect texture, flavor, and crumb. Together, these simple essentials create a soft yet resilient bread that’s an ideal canvas for all your favorite fillings.
- Bread flour: Provides the high protein needed for strong gluten formation, delivering that essential chew and structure.
- Lukewarm water: Activates the yeast gently without killing it, creating the perfect environment for rising.
- Unsalted butter (softened): Adds richness and tenderness to the dough for a velvety crumb.
- Honey: A natural sweetener that enhances flavor and helps create a golden crust.
- Instant yeast: Powers the dough’s rise, giving you reliable lift without the wait of traditional yeast.
- Sea salt: Balances the sweetness and improves the dough’s overall flavor and fermentation.
- Unsalted butter (for brushing and tins): Keeps the crust soft while preventing the bread from sticking and adds an inviting sheen.
How to Make Sandwich Bread
Step 1: Combine Dry Ingredients
Begin by adding the bread flour, instant yeast, and sea salt into the bowl of a stand mixer fitted with a dough hook. This step ensures the yeast and salt are evenly distributed throughout the flour, which is crucial for a balanced rise and flavor. Mixing the dry ingredients first prepares them perfectly for the wet additions.
Step 2: Add Wet Ingredients and Knead
While the mixer is running on a slow speed, gradually pour in the lukewarm water, followed by the honey and softened butter. The dough hook will do its magic kneading the dough for about 5 to 7 minutes until everything is fully combined. You’ll notice the dough pulling away from the sides of the bowl and feeling tacky but not sticky to the touch—a sign your gluten is developing beautifully.
Step 3: First Rise (Bulk Fermentation)
Once kneaded, shape the dough into a round and place it back in a lightly oiled bowl. Drizzle some oil on top of the dough as well, then cover it with plastic wrap and set it in a warm spot for approximately 2 hours. This first rise allows the yeast to ferment the dough slowly, developing flavor complexities and building a strong gluten network to support the air pockets become that fluffy Sandwich Bread we love.
Step 4: Prepare Loaf Tins
While your dough is rising, make sure to butter your loaf tins thoroughly to prevent sticking and add flavor. This little step ensures your Sandwich Bread comes out perfectly intact when baking time arrives.
Step 5: Shape Dough and Second Rise (Proofing)
Punch down your risen dough gently and transfer it to a clean surface—resist the urge to add extra flour here for the softest crumb. Divide the dough into two equal portions and shape each into a tight log by rolling and folding gently. Place the shaped dough seam side down into your prepared loaf tins. Cover loosely with plastic wrap and allow to proof for 40 minutes to an hour until the dough rises just above the edge of the tin.
Step 6: Bake and Butter the Loaves
Preheat your oven to 350°F (176°C). Slide your loaf tins into the oven and bake for 40 to 42 minutes until the crust turns a rich golden brown. As soon as the bread comes out, brush the tops generously with melted butter—and for a hint of added sweetness, consider brushing some honey over the crust. After resting 10 minutes in the tins, transfer the loaves to a rack to cool completely. This finishing touch locks in moisture and keeps the crust tender.
How to Serve Sandwich Bread

Garnishes
Sandwich Bread is a blank slate that pairs beautifully with a variety of toppings. A slather of creamy avocado, a sprinkle of fresh herbs like basil or chives, or even a drizzle of olive oil and sea salt transforms a simple slice into a gourmet treat. Feel free to get creative with your garnishes to elevate your sandwiches or toast.
Side Dishes
Pair your Sandwich Bread with classic sides such as crisp pickle spears, a fresh green salad dressed lightly with lemon vinaigrette, or a bowl of warming tomato soup. These complement the bread’s soft texture and subtle sweetness, making your meal satisfying and balanced.
Creative Ways to Present
To make ordinary sandwiches extraordinary, try layering your Sandwich Bread slices with colorful veggies, artisan cheeses, and flavorful spreads for a vibrant, eye-catching presentation. Toast the bread lightly for added crunch or use cookie cutters to shape fun sandwiches that kids will adore. No matter how you serve it, this bread is sure to be the star of your meal.
Make Ahead and Storage
Storing Leftovers
Once your Sandwich Bread is completely cool, store any leftovers at room temperature in a sealed plastic bag or bread box for up to three days. This maintains the bread’s softness and prevents it from drying out too quickly.
Freezing
If you want to enjoy your homemade Sandwich Bread longer, slice it and freeze the portions in an airtight container or freezer bag. This way, you can grab just a slice or two whenever the sandwich craving hits. For best freshness, use frozen bread within one month.
Reheating
To revive frozen or day-old Sandwich Bread, simply toast the slices lightly or warm them in the oven wrapped in foil for 5–10 minutes. Brushing a bit of butter before warming will reinvigorate that soft crust and rich flavor, making the bread taste fresh again.
FAQs
Can I use all-purpose flour instead of bread flour?
While all-purpose flour can be substituted, bread flour is preferred because it has more protein, which helps develop gluten and results in that soft yet sturdy Sandwich Bread texture. Using all-purpose flour might produce a slightly denser loaf.
Is it necessary to use a stand mixer for this recipe?
Although a stand mixer with a dough hook makes kneading easier and more consistent, you can knead this dough by hand. Just be prepared to knead for about 10-15 minutes until the dough becomes smooth and elastic.
Can I replace honey with another sweetener?
Yes! Maple syrup, agave nectar, or even granulated sugar can work in place of honey, though they may slightly alter the flavor and crust color. Honey adds a subtle floral sweetness that complements the bread beautifully.
How do I know when the bread is fully baked?
Look for a deep golden brown crust on top and make sure the bread sounds hollow when you tap the bottom. If you have a food thermometer, the internal temperature should be around 190°F (88°C).
Why does the recipe suggest weighing ingredients?
Weighing ingredients ensures precision and consistency, especially with flour, which can vary greatly when measured by volume. This accuracy helps produce the ideal dough texture and rise for your Sandwich Bread every time.
Final Thoughts
Making your own Sandwich Bread at home may seem a bit ambitious at first, but once you experience pulling a warm, golden loaf from the oven and slicing into its soft, airy crumb, you’ll wonder why you ever bought bread from the store. This recipe brings joy not just in the eating but throughout the process, turning simple ingredients into something comfortingly extraordinary. I can’t wait for you to try this recipe and make many delicious memories with your Sandwich Bread.
Print
Sandwich Bread Recipe
- Total Time: 3 hours (including rises)
- Yield: 2 loaves (1 pound each) 1x
- Diet: Vegetarian
Description
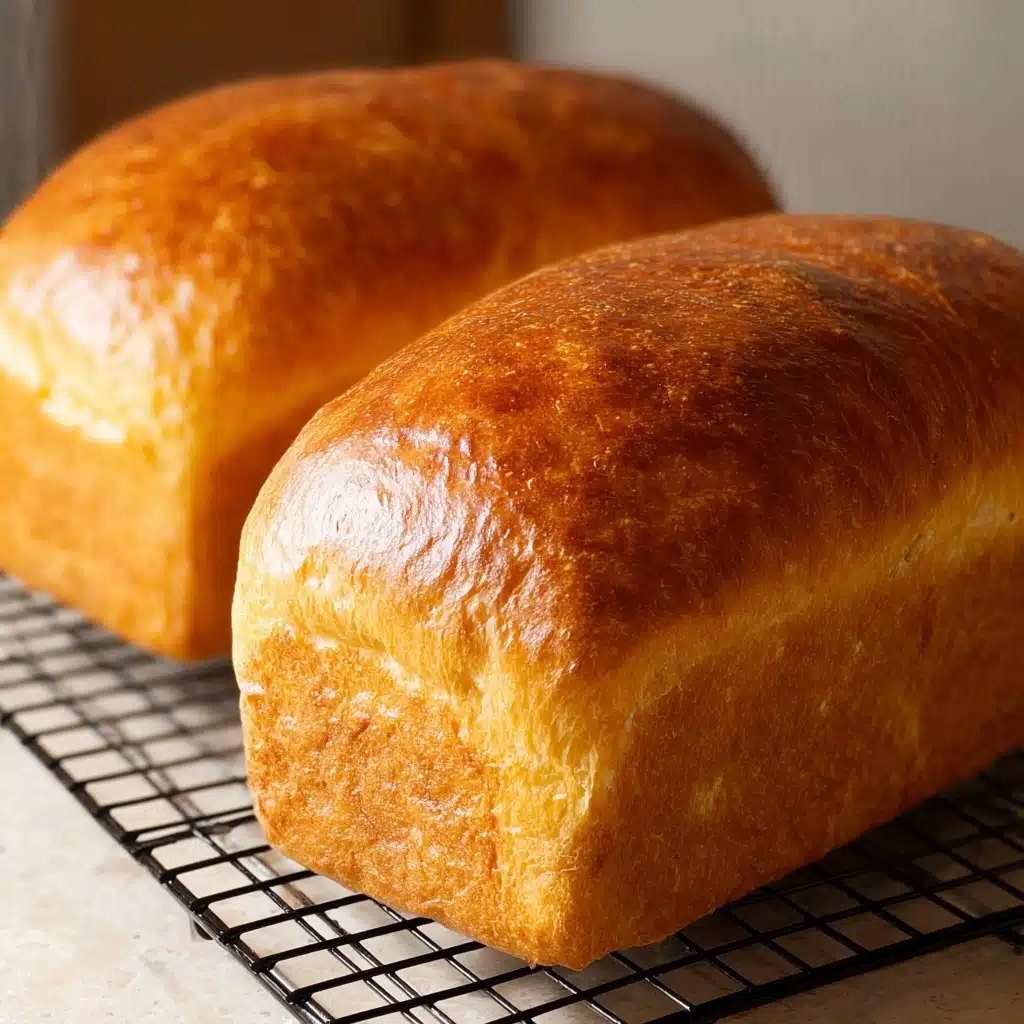
This classic sandwich bread recipe produces soft, fluffy loaves with a tender crumb and golden crust, perfect for sandwiches or toast. Made with simple ingredients like bread flour, honey, butter, and yeast, it offers a slightly sweet flavor and an irresistibly soft texture. Ideal for home bakers looking to enjoy fresh, homemade bread with a light, airy structure and a rich buttery finish.
Ingredients
Dry Ingredients
- 6½ cups bread flour
- 3 teaspoons instant yeast
- 3 teaspoons sea salt
Wet Ingredients
- 2 cups lukewarm water (may substitute with 1 cup milk and 1 cup water)
- 5 Tablespoons unsalted butter, softened
- 2 Tablespoons honey
For Preparation and Baking
- 1 Tablespoon unsalted butter for brushing on the bread
- 1 Tablespoon unsalted butter for greasing the loaf tins
Instructions
- Prepare the Dry Ingredients: Add the bread flour, instant yeast, and sea salt into the bowl of a stand mixer fitted with a dough hook. Mix briefly to combine the dry ingredients evenly.
- Add Wet Ingredients and Knead: With the mixer running on slow speed, slowly pour in the lukewarm water followed by the honey and softened butter. Continue kneading for 5 to 7 minutes until the dough is smooth, tacky but not sticky, and starts pulling away from the bowl edges. Use oiled fingers to handle the dough if it feels sticky.
- First Rise / Bulk Fermentation: Shape the dough into a round ball and place it back into the mixing bowl. Lightly oil the surface of the dough and the bowl edges, cover with plastic wrap, and let it rise in a warm spot for about 2 hours or until the dough doubles in size. This step allows yeast fermentation to develop flavor and gluten structure.
- Prepare Loaf Tins: Grease two 1lb loaf tins thoroughly with softened butter and set aside.
- Divide and Shape the Dough: Punch down the risen dough to release air bubbles and transfer it onto a clean, dry surface without adding flour. Weigh the dough and divide it equally into two portions (about 670g each). Working with one piece at a time, gently flatten it into a rectangle approximately the width of the loaf tin. Roll the dough tightly from the edge closest to you, folding the sides towards the center as you continue rolling to form a tight log. Pinch the seam to seal.
- Place Dough in Loaf Tins: Place each dough log seam side down into the prepared loaf tins. Gently press the surface to release any surface bubbles.
- Second Rise / Proofing: Loosely cover the tins with plastic wrap and allow the dough to rise for 40 minutes to 1 hour, until it rises just above the edges of the tins. This shorter rise improves volume and final texture.
- Preheat Oven: While the dough is proofing, preheat your oven to 350°F (176°C).
- Bake the Bread: Remove the plastic wrap and bake the loaves for 40 to 42 minutes until the crust turns deeply golden brown. Immediately brush the tops with 1 tablespoon of melted butter (you may add honey to the butter for a sweeter finish) to keep the crust soft and enhance flavor.
- Cool and Serve: Let the bread cool in the tins for at least 10 minutes before transferring to a wire rack to cool completely. Slice only when fully cooled for the best texture. Store leftovers at room temperature for up to 3 days.
Notes
- Use metric measurements and weigh ingredients for best accuracy; fluff flour with a fork before measuring if no scale is available.
- The first rise (bulk fermentation) is essential for flavor development and dough structure.
- Do not add extra flour while shaping; the dough should be handled gently.
- Butter the inside of loaf tins well to prevent sticking and help with crust softness.
- The second rise (proofing) improves volume and crumb texture.
- Brushing the baked loaves with butter while warm keeps the crust tender and adds richness.
- Slice bread only once completely cool to avoid gummy texture.
- Store bread in a bread box or loosely covered at room temperature for up to 3 days; avoid refrigeration to prevent staling.
- Prep Time: 15 minutes
- Cook Time: 40-42 minutes
- Category: Bread
- Method: Baking
- Cuisine: American/European
Nutrition
- Serving Size: 1 slice (about 50g)
- Calories: 140 kcal
- Sugar: 2.5 g
- Sodium: 220 mg
- Fat: 3.5 g
- Saturated Fat: 2.2 g
- Unsaturated Fat: 1 g
- Trans Fat: 0 g
- Carbohydrates: 24 g
- Fiber: 1 g
- Protein: 4 g
- Cholesterol: 10 mg
Keywords: sandwich bread, homemade bread, soft bread, yeast bread, fluffy bread, easy bread recipe


