
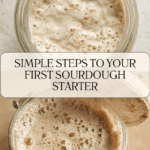
Easy Beginner Sourdough Starter Recipe
Ready to embark on your sourdough journey? This Easy Beginner Sourdough Starter Recipe is the perfect place to start. With just a couple of humble ingredients and a touch of patience, you’ll find yourself nurturing a living, bubbling culture that makes bread dreams come true. There’s something truly magical about transforming simple flour and water into a foundation for home-baked loaves, tangy pancakes, and rustic pizza crusts—all while enjoying the mouthwatering aroma of naturally fermented dough. Let’s dive in, and I’ll walk you through every cozy, rewarding step of creating your very first sourdough starter from scratch!
Ingredients You’ll Need
Simplicity is key here, but don’t underestimate how each ingredient and tool plays a vital role in your sourdough success. Every item, from the flour to the glass jar, helps shape the flavor, texture, and life of your new starter culture. Let’s get everything lined up before we begin!
- Organic, unbleached all-purpose flour (1 5lb bag): This is your starter’s primary food source; choosing unbleached, organic flour will provide optimal nutrients for the best rise and flavor.
- Water: Preferably filtered or spring water, as chlorine can inhibit fermentation; this keeps your starter active and lively.
- Glass jar with lid (16 ounces, 2 cups): Clear glass lets you watch the bubbles form and track your starter’s growth—it’s satisfying and practical!
- Additional glass jar (optional): If you want to save discard for future recipes, a second jar is super handy.
- Wooden spoon: Gentle on the jar and starter, it stirs things up without introducing any unwanted metals or contaminants.
- Silicone or rubber spatula: Perfect for scraping down the sides, so you don’t leave behind any precious starter.
- Rubber band or wet-erase marker: Use this to track how much your starter rises—seeing it double in size is the best part!
How to Make Easy Beginner Sourdough Starter Recipe
Step 1: Mix Your First Batch
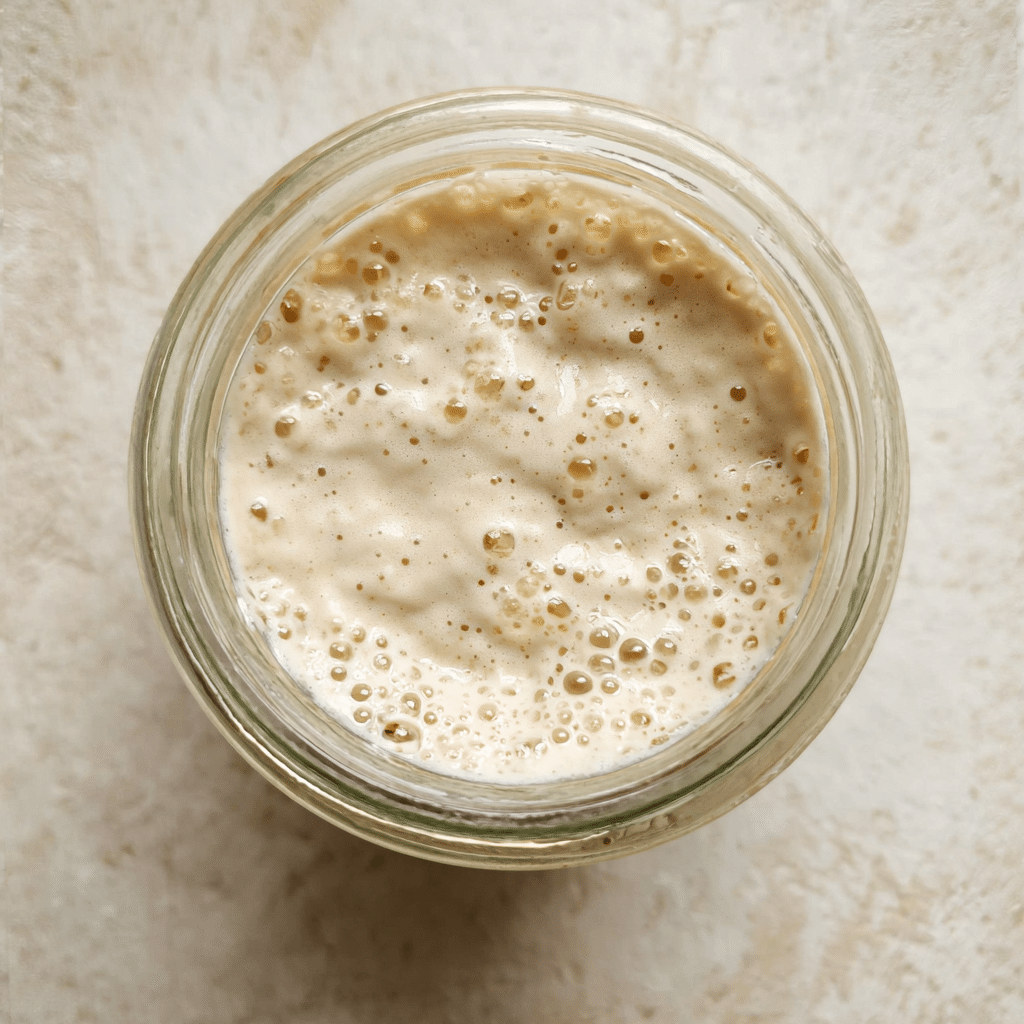
To kick off your Easy Beginner Sourdough Starter Recipe, combine 1/2 cup (60 grams) of flour and 1/4 cup (60 grams) of water in your clean glass jar. Using a wooden spoon, mix it vigorously until there are no dry patches left and you have a thick, sticky batter. Scrape down the sides with your spatula, then loosely cover the jar. Find a warm, steady spot, like the oven with the light on or above your fridge. Now, let your baby starter rest and start working its magic for 24 hours.
Step 2: Feed and Discard
On day two, you’ll notice some subtle changes—maybe a few bubbles or a slight aroma. Remove half of the mixture (you can discard it, or save it for future recipes in another jar). Add 1/2 cup flour and 1/4 cup water to what’s left in your starter jar. Stir well, scrape the sides, cover, and place it right back in your warm spot for another day. This daily ritual gives your starter fresh food and keeps it lively.
Step 3: Repeat and Watch the Transformation
For days three through seven, repeat the process: remove half, feed with fresh flour and water, mix, scrape, and cover. Each day, you’ll watch as your Easy Beginner Sourdough Starter Recipe starts to rise higher, get bubblier, and develop a tangy aroma that signals good fermentation. Consistency is key—feed at about the same time daily!
Step 4: Track and Test for Readiness
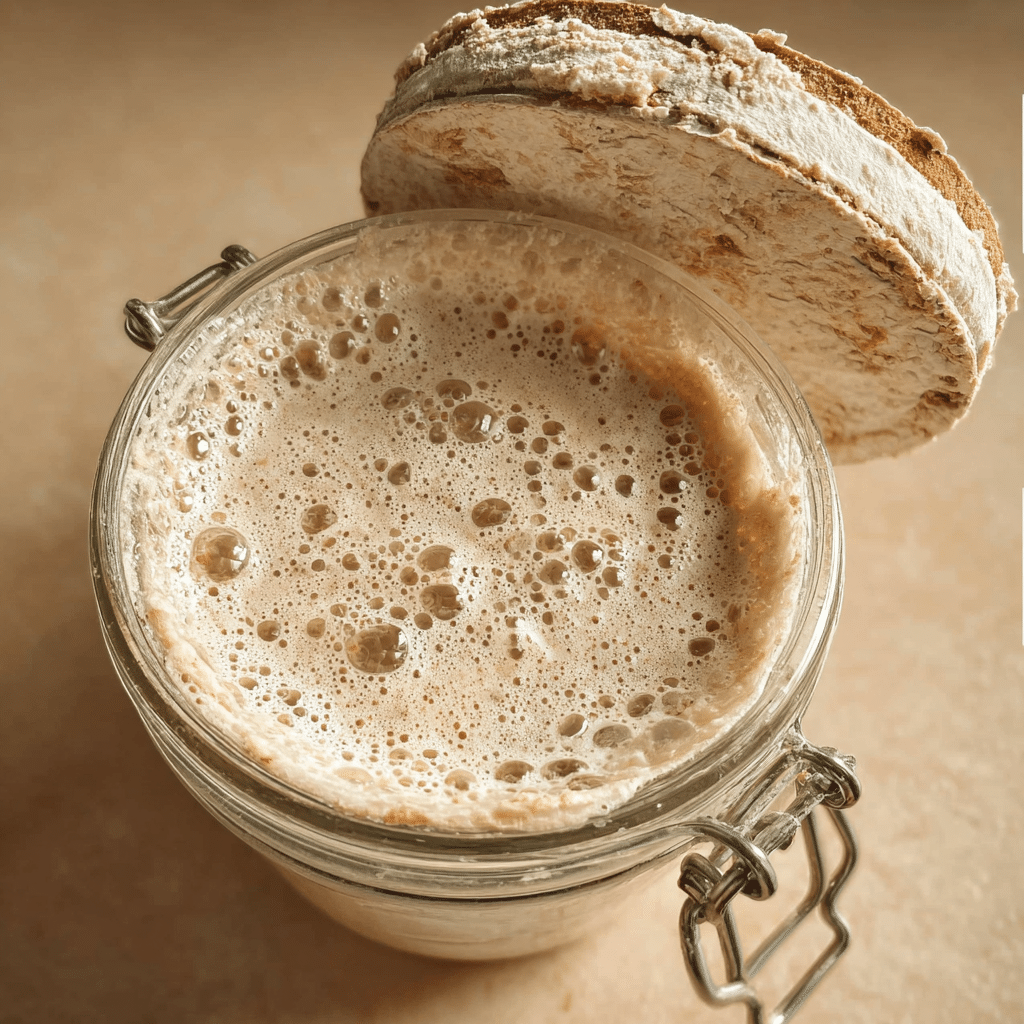
Starting in the second week, keep up with the same routine, but now use a rubber band or wet-erase marker to track your starter’s progress after each feeding. When the mixture reliably doubles in size after feeding and smells pleasantly sour (rather than sharp or off), it’s time for the float test! Drop a spoonful into a cup of water—if it floats, your Easy Beginner Sourdough Starter Recipe is alive and ready for baking adventures. If not, keep feeding and testing every day or two until it rises to the occasion.
How to Serve Easy Beginner Sourdough Starter Recipe
Garnishes
There’s no need to garnish your starter itself, but once you start baking, a sprinkle of seeds, a shower of herbs, or a dusting of flour can transform your sourdough’s rustic crust. Fresh thyme, sesame seeds, or flaky sea salt all look gorgeous and add bursts of flavor to the final bread.
Side Dishes
A slice of homemade sourdough pairs beautifully with soups, hearty stews, and vibrant salads. Once your Easy Beginner Sourdough Starter Recipe is up and running, try using your starter in pancakes or waffles for an unbeatable weekend breakfast spread.
Creative Ways to Present
Let your new starter shine in classic crusty loaves, but don’t stop there—portion off bits of your well-fed starter for everything from English muffins to pizza dough. Package a little starter in a cute jar with handwritten instructions as a thoughtful edible gift for fellow bakers!
Make Ahead and Storage
Storing Leftovers
Once your starter is established, keep it in the refrigerator if you don’t plan to bake every day. Simply cover the jar, pop it in the fridge, and feed it once a week to maintain its vigor. Save any discard in a separate jar to use for recipes like crackers or pancakes; nothing goes to waste!
Freezing
Did you know you can freeze your sourdough starter? Spoon some into a freezer-safe container, making sure to leave space for it to expand. Thaw it in the fridge overnight, then resume regular feedings for a couple of days before baking again.
Reheating
Sourdough starter doesn’t technically need reheating, but bringing a refrigerated or thawed starter back to room temperature before feeding or baking gives you the most predictable rise and activity. Just set the jar out on the counter a few hours ahead, and you’ll be ready to mix up your next dough.
FAQs
Why does my starter smell weird?
A little tang is normal, but if your starter smells truly offensive or rotten, it might be a sign of contamination or neglect. Discard any discolored or moldy portions, and if in doubt, start fresh with your Easy Beginner Sourdough Starter Recipe for optimal flavor and safety.
Do I have to use organic flour?
While organic, unbleached flour helps your sourdough starter thrive by providing trace minerals and natural yeast, you can still have success with regular all-purpose flour in a pinch—the key is avoiding bleached flours or those with additives.
What if I forget to feed my starter?
Life happens! If your Easy Beginner Sourdough Starter Recipe gets neglected, just scrape off any dark liquid, give it a couple of regular feedings, and see if it bounces back. Starters are resilient; just avoid using it for baking if it shows mold or a pink tinge.
Can I reduce the amount I throw out during feeding?
Absolutely! You can use a smaller jar and halve your daily feedings once the starter is established, just keep the ratios consistent. And don’t forget to use your “discard” in tasty recipes like crackers or muffins.
How long before I can bake bread with my starter?
Most Easy Beginner Sourdough Starter Recipe cultures are ready in about 7 to 14 days, depending on your environment. Wait until your starter reliably doubles in size and passes the float test before tackling your first loaf.
Final Thoughts
There’s something joyful and grounding about tending a sourdough starter from the very first flour-and-water mix. With this Easy Beginner Sourdough Starter Recipe, you’ve started a delicious tradition that can last a lifetime—and bring the best homemade bread within reach, anytime. Give it a try and see where your own starter takes you!
Print
Easy Beginner Sourdough Starter Recipe
- Total Time: 7-14 days
- Yield: 1 sourdough starter 1x
- Diet: Vegetarian
Description
Learn how to create a simple sourdough starter perfect for beginners, with step-by-step instructions for a successful fermentation process.
Ingredients
Day 1:
- 1/2 cup (60 grams) organic, unbleached all-purpose flour
- 1/4 cup (60 grams) water
Day 2:
- 1/2 cup (60 grams) organic, unbleached all-purpose flour
- 1/4 cup (60 grams) water
Day 3-7:
- 1/2 cup (60 grams) organic, unbleached all-purpose flour
- 1/4 cup (60 grams) water
Day 7-14:
- 1/2 cup (60 grams) organic, unbleached all-purpose flour
- 1/4 cup (60 grams) water
- glass jar with lid
- additional glass jar for discard (if keeping)
- wooden spoon
- silicone or rubber spatula
- rubber band or wet-erase marker
Instructions
- Day 1: Place flour and water in a glass jar, mix well, cover, and let sit in a warm spot for 24 hours.
- Day 2: Remove half of the starter, replenish with flour and water, stir well, cover, and leave in a warm spot for 24 hours.
- Day 3-7: Repeat the Day 2 process daily.
- Day 7-14: Continue the process, monitoring for doubling in size and a tangy smell. Test starter readiness by placing a spoonful in water – if it floats, it’s ready!
Notes
- Ensure a warm environment for the starter.
- Use a rubber band or marker to track starter growth.
- Experiment with sourdough baking once starter is active.
- Prep Time: 5 minutes
- Cook Time: 0 minutes
- Category: Bread
- Method: Fermentation
- Cuisine: International
Nutrition
- Serving Size: 1 serving
- Calories: Varies
- Sugar: 0g
- Sodium: 0mg
- Fat: 0g
- Saturated Fat: 0g
- Unsaturated Fat: 0g
- Trans Fat: 0g
- Carbohydrates: Varies
- Fiber: Varies
- Protein: Varies
- Cholesterol: 0mg
Keywords: Sourdough Starter, Fermentation, Beginner Recipe


