
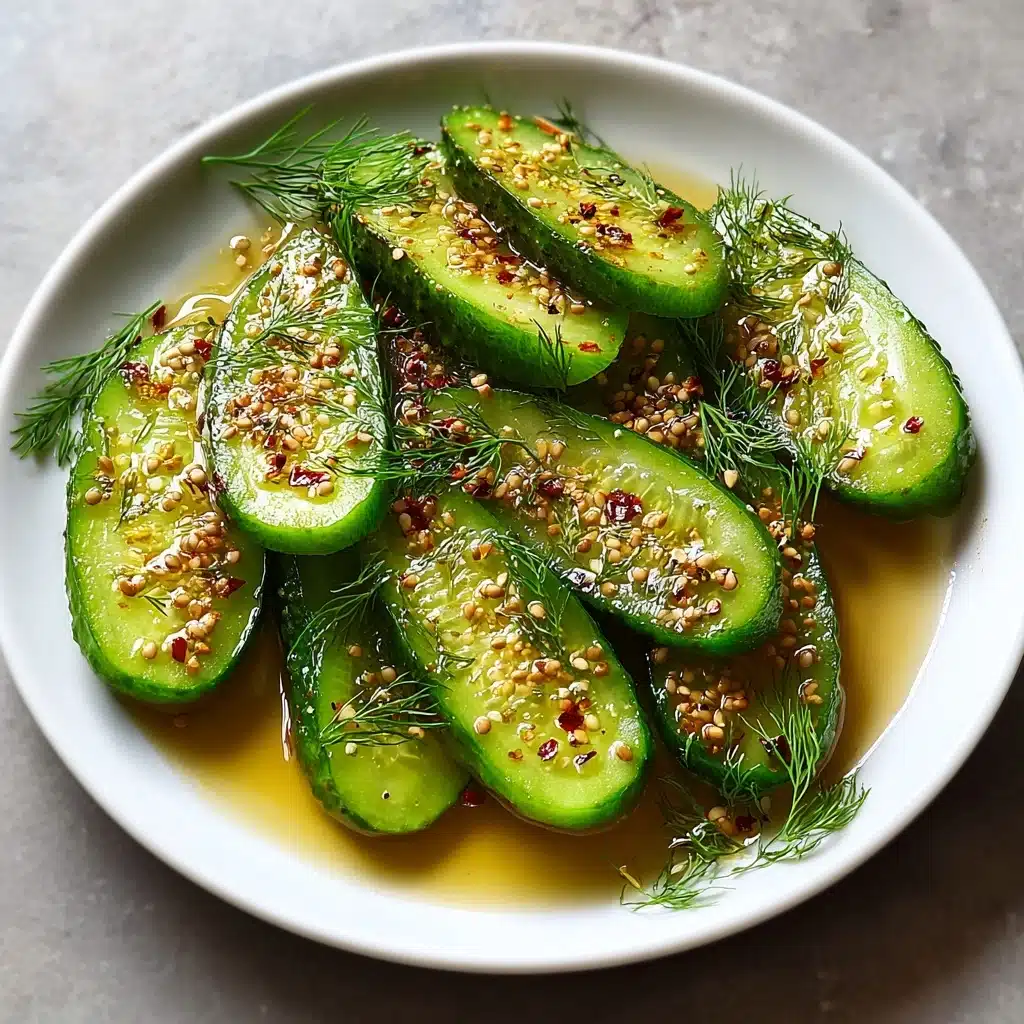
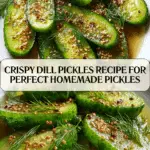
Crispy Dill Pickle Recipe
If you love a good tangy crunch, you are going to fall head over heels for this Crispy Dill Pickle recipe. It’s the kind of treat that wakes up your taste buds with its perfect balance of vinegary zing, aromatic dill, and just the right touch of spices for depth. The real magic here is in the crispy texture that holds up bite after bite, whether you’re grabbing a quick snack or jazzing up your favorite sandwich. This recipe is wonderfully simple yet delivers a deliciously bold flavor that feels like homemade love packed into every jar.
Ingredients You’ll Need
These ingredients may seem straightforward, but each one is essential in building the vibrant, complex flavor and perfect crunch of your Crispy Dill Pickle. From the crisp cucumbers to the pickling salt and fragrant dill, every item plays a crucial role.
- Small cucumbers (8-10): Using pickling cucumbers ensures the ideal firmness and size for pickling.
- Water (4 cups): Clean, neutral water forms the base of the brine to immerse the cucumbers.
- White vinegar (2 cups): This brings the signature tang and helps preserve the pickles.
- Pickling salt (1/4 cup): Unlike table salt, it dissolves easily and keeps the pickle crisp.
- Sugar (1 tablespoon): Adds a subtle sweetness to balance the acidity.
- Garlic cloves (4-5, smashed): Provides aromatic depth and a hint of savory punch.
- Fresh dill sprigs (4-5): The star seasoning delivering that unmistakable dill flavor.
- Mustard seeds (1 tablespoon): Adds a slight earthy warmth and tiny bursts of flavor.
- Black peppercorns (1 tablespoon): For gentle heat and complexity.
- Red pepper flakes (1 teaspoon, optional): Introduces a subtle spicy kick if you like your pickles with a bit of fire.
- Crushed coriander seeds (1/2 teaspoon): Adds a citrusy, nutty undertone that enhances the overall flavor.
How to Make Crispy Dill Pickle
Step 1: Prep the Cucumbers
Start by giving your cucumbers a thorough rinse under cold water to wash away any dirt or residue. Pat them dry carefully to prevent excess moisture that can affect crispness. Then slice off the blossom end from each cucumber as this end has enzymes that might make your pickles soft over time. This small step helps keep that coveted crunch intact.
Step 2: Make the Brine
In a large saucepan, combine water, white vinegar, pickling salt, and sugar. Heat the mixture while stirring until it reaches a boil—this helps the salt and sugar dissolve fully. Once boiling, remove it from the heat and allow the brine to cool completely to room temperature, which is key for maintaining cucumber texture during pickling.
Step 3: Sterilize Your Jars
To keep your Crispy Dill Pickle safe and fresh, sterilize your canning jars and lids by boiling them in water for 10 minutes. Let them air dry on a clean towel. This step may seem tedious, but it’s crucial to prevent any unwanted bacteria from interfering with your pickles’ flavor and shelf life.
Step 4: Pack the Jars
Layer each jar with a fresh dill sprig, a smashed garlic clove, mustard seeds, black peppercorns, a pinch of red pepper flakes if using, and crushed coriander seeds. Then pack your cucumbers vertically inside the jars, keeping around a ½ inch gap at the top for the brine. This alignment ensures each cucumber soaks up the flavorful brine evenly.
Step 5: Add the Brine and Seal
Pour the cooled brine into the jars, submerging all the cucumbers completely, but maintain the ½ inch headspace to allow for expansion. Seal the jars tightly with the sterilized lids. Let these jars rest at room temperature for about 12 hours; this jumpstarts the pickling process before refrigeration.
Step 6: Refrigerate and Let Flavors Develop
Transfer your sealed jars to the refrigerator. For the crispiest, most flavorful experience, allow the pickles to sit for at least 48 hours. If patience is your friend, waiting a full week brings an exceptionally deep and balanced flavor that makes your Crispy Dill Pickle shine as a star condiment or snack.
How to Serve Crispy Dill Pickle

Garnishes
A sprinkle of fresh dill or a few additional crushed peppercorns on the side can brighten the presentation and enhance aroma. You might also drizzle a touch of olive oil if serving as part of a charcuterie board to add richness alongside the pickle’s sharp bite.
Side Dishes
Crispy Dill Pickle is fantastic paired with hearty sandwiches, burgers, or as a palate-cleansing side to grilled meats. It adds a lively contrast to creamy salads or can be chopped and tossed into potato salad for that extra punch of flavor.
Creative Ways to Present
Try slicing your Crispy Dill Pickle into thin coins for tangy garnish on deviled eggs or tacos. Alternatively, stuff whole small pickles into sandwiches or wraps for an unexpected crunch. For a fun appetizer, wrap them in thin slices of cured meat or cheese for a bite-sized flavor explosion.
Make Ahead and Storage
Storing Leftovers
Once opened, your Crispy Dill Pickle jars should be stored in the refrigerator and enjoy within a month for the best crunch and flavor. Keeping them chilled slows the pickling process and maintains texture.
Freezing
Because of their high water content, pickles don’t freeze well as they will become mushy upon thawing. It’s best to consume your Crispy Dill Pickle fresh or refrigerated instead of freezing.
Reheating
Pickles are meant to be enjoyed cold or at room temperature. Avoid reheating them to preserve that signature crispness and bright flavor. If needed, simply let refrigerated pickles sit out for a few minutes before serving for the best experience.
FAQs
Can I use regular cucumbers instead of pickling cucumbers?
While regular cucumbers can work, they tend to have thinner skin and higher water content which may lead to softer pickles. Pickling cucumbers provide the ideal firmness to achieve that sought-after crispy texture.
Why do I need to remove the blossom end of the cucumber?
The blossom end contains enzymes that can cause your pickles to become soft or mushy over time. Removing it helps your Crispy Dill Pickle stay firm and fresh for longer.
How long do I have to wait before eating the pickles?
You can start tasting your pickles after 48 hours in the fridge, but waiting a full week allows the flavors to deepen and ensures maximum crispness and tang.
Can I make these pickles spicy?
Yes! Adding red pepper flakes or even a sliced jalapeño to the jars before sealing will give your Crispy Dill Pickle a nice spicy kick to wake up your palate.
Do I need to sterilize the jars if I’m refrigerating the pickles?
Sterilizing jars is always recommended to prevent any contamination and help your pickles last longer, although refrigeration slows down the growth of bacteria significantly.
Final Thoughts
There is truly nothing like a homemade Crispy Dill Pickle to brighten your meals and snacks with vibrant flavor and that irresistible crunch. Once you try this recipe, you might find yourself reaching for a pickle more often than you expected—it’s just that good. So gather your ingredients and jar up some crisp dill magic right at home!
Print
Crispy Dill Pickle Recipe
- Total Time: 12 hours and 25 minutes (including resting time)
- Yield: 4–5 pint jars 1x
- Diet: Vegetarian
Description
This Crispy Dill Pickle recipe offers a perfect balance of tangy, garlicky flavors with a satisfying crunch. Made using fresh cucumbers and a flavorful brine infused with dill, garlic, mustard seeds, and peppercorns, these pickles are easy to prepare and ideal for snacking or adding to sandwiches and salads.
Ingredients
Pickling Ingredients
- 8–10 small cucumbers, pickling variety preferred
- 4 cups water
- 2 cups white vinegar
- 1/4 cup pickling salt
- 1 tablespoon sugar
Spices and Aromatics
- 4–5 cloves garlic, peeled and smashed
- 4 fresh dill sprigs
- 1 tablespoon mustard seeds
- 1 tablespoon black peppercorns
- 1 teaspoon red pepper flakes (optional for a spicy kick)
- 1/2 teaspoon crushed coriander seeds
Instructions
- Wash Cucumbers: Begin by thoroughly washing the cucumbers under cold water to remove any dirt. Pat them dry with a clean kitchen towel to ensure no excess moisture remains.
- Trim Blossom Ends: Slice off the blossom end of each cucumber, as it can contain enzymes that might cause the pickles to soften over time.
- Prepare Brine: In a large saucepan, combine water, white vinegar, pickling salt, and sugar. Stir the mixture well and bring it to a boil. Once boiling, remove from heat and allow the brine to cool completely to room temperature.
- Sterilize Jars: Sterilize your canning jars and lids by boiling them in water for 10 minutes. Carefully remove them and let air dry on a clean surface to avoid contamination.
- Add Spices to Jars: In each sterilized jar, place one sprig of fresh dill, one clove of smashed garlic, a few mustard seeds, five black peppercorns, a pinch of red pepper flakes (if desired), and a pinch of crushed coriander seeds for aromatic layers of flavor.
- Pack Cucumbers: Vertically pack the cucumbers tightly into each jar, leaving about 1/2 inch of headspace at the top to allow for expansion during pickling.
- Fill with Brine: Pour the cooled brine solution over the cucumbers in each jar, ensuring the cucumbers are fully submerged and that the 1/2 inch headspace is maintained to prevent overflow.
- Seal and Rest: Seal the jars securely with the sterilized lids. Let the jars sit at room temperature for approximately 12 hours to begin the fermentation and pickling process.
- Refrigerate: Transfer the jars to the refrigerator. Let the pickles sit for at least 48 hours before eating, although waiting a full week will develop deeper, more flavorful pickles.
- Serve: Chill the pickles thoroughly in the refrigerator before serving to enjoy their signature crispy bite and refreshing tang.
Notes
- Using pickling cucumbers helps maintain a crisp texture; larger slicing cucumbers may become soft.
- Slicing off the blossom end prevents enzymatic softening and extends pickle crunchiness.
- Adjust red pepper flakes to control spice level or omit for mild flavor.
- Ensure jars and lids are properly sterilized to prevent spoilage.
- For best flavor, allow pickles to mature for at least a week in the refrigerator.
- These pickles should be consumed within 2 months for optimal freshness.
- Prep Time: 15 minutes
- Cook Time: 10 minutes
- Category: Condiment, Snack
- Method: Pickling
- Cuisine: American
Nutrition
- Serving Size: 1 medium pickle (approximately 50g)
- Calories: 10
- Sugar: 0.5g
- Sodium: 420mg
- Fat: 0g
- Saturated Fat: 0g
- Unsaturated Fat: 0g
- Trans Fat: 0g
- Carbohydrates: 2g
- Fiber: 0.5g
- Protein: 0.3g
- Cholesterol: 0mg
Keywords: crispy pickles, dill pickles, homemade pickles, quick pickles, refrigerator pickles, garlic pickles, crunchy pickles, easy pickle recipe
