
Baked Ground Chicken Tacos Recipe
Introduction
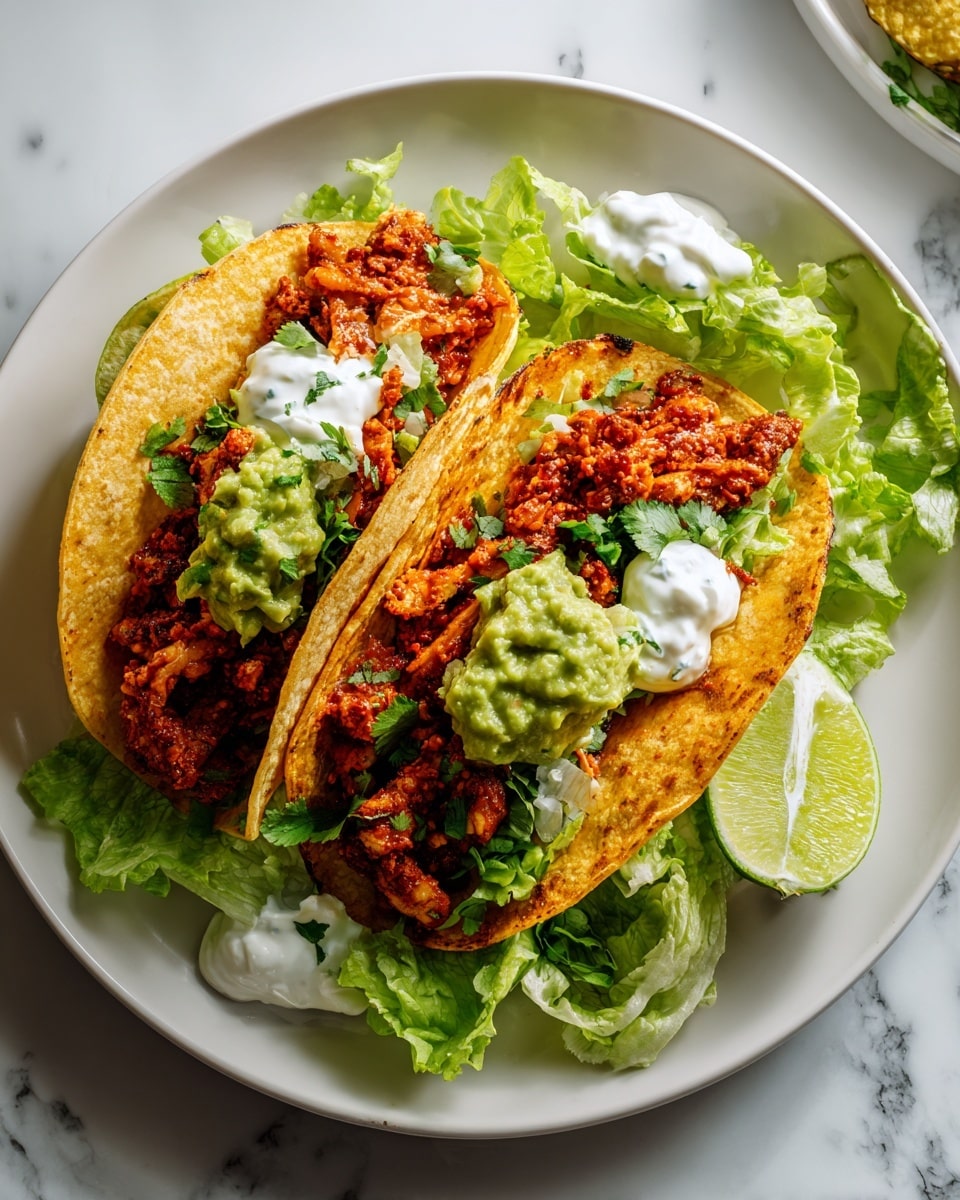
These baked ground chicken tacos are a flavorful and easy meal perfect for busy weeknights. Tender, seasoned chicken pairs beautifully with melted cheese inside crispy tortillas, creating a satisfying dish the whole family will love.
Ingredients
- 3 tablespoons oil (divided into 1 tbsp and 2 tbsp)
- 1 small onion (finely diced)
- ½ teaspoon salt
- 1 tablespoon minced garlic
- 1 pound ground chicken
- 3 tablespoons taco seasoning
- 1 teaspoon paprika
- 1 teaspoon garlic powder
- ¾ cup chicken broth (low sodium)
- ½ cup salsa
- 15 corn tortillas (white or yellow)
- 2 to 2½ cups shredded cheese
Instructions
- Step 1: Preheat your oven to 400°F (200°C) and line two sheet pans with parchment paper.
- Step 2: Heat 1 tablespoon of oil in a large skillet over medium heat. Add the diced onions and sauté for 2 to 3 minutes until softened. Stir in the salt and minced garlic, cooking for another minute until fragrant.
- Step 3: Add the ground chicken to the skillet and cook for 2 to 3 minutes, breaking it up with a spatula so it cooks evenly.
- Step 4: Sprinkle the taco seasoning, paprika, and garlic powder over the chicken. Mix briefly to combine, no need for perfect mixing.
- Step 5: Pour in the chicken broth and salsa, stirring everything together. Reduce heat to medium-low and simmer for 4 to 5 minutes until the sauce thickens to your liking.
- Step 6: While the chicken simmers, warm your tortillas. Wrap the stack in a slightly damp towel and microwave on high for 60 seconds, or wrap in foil and bake in the oven for 10 minutes.
- Step 7: Arrange the tortillas on the parchment-lined sheet pans. Brush or spray one side of each tortilla with olive oil and place them on the pan oil side down.
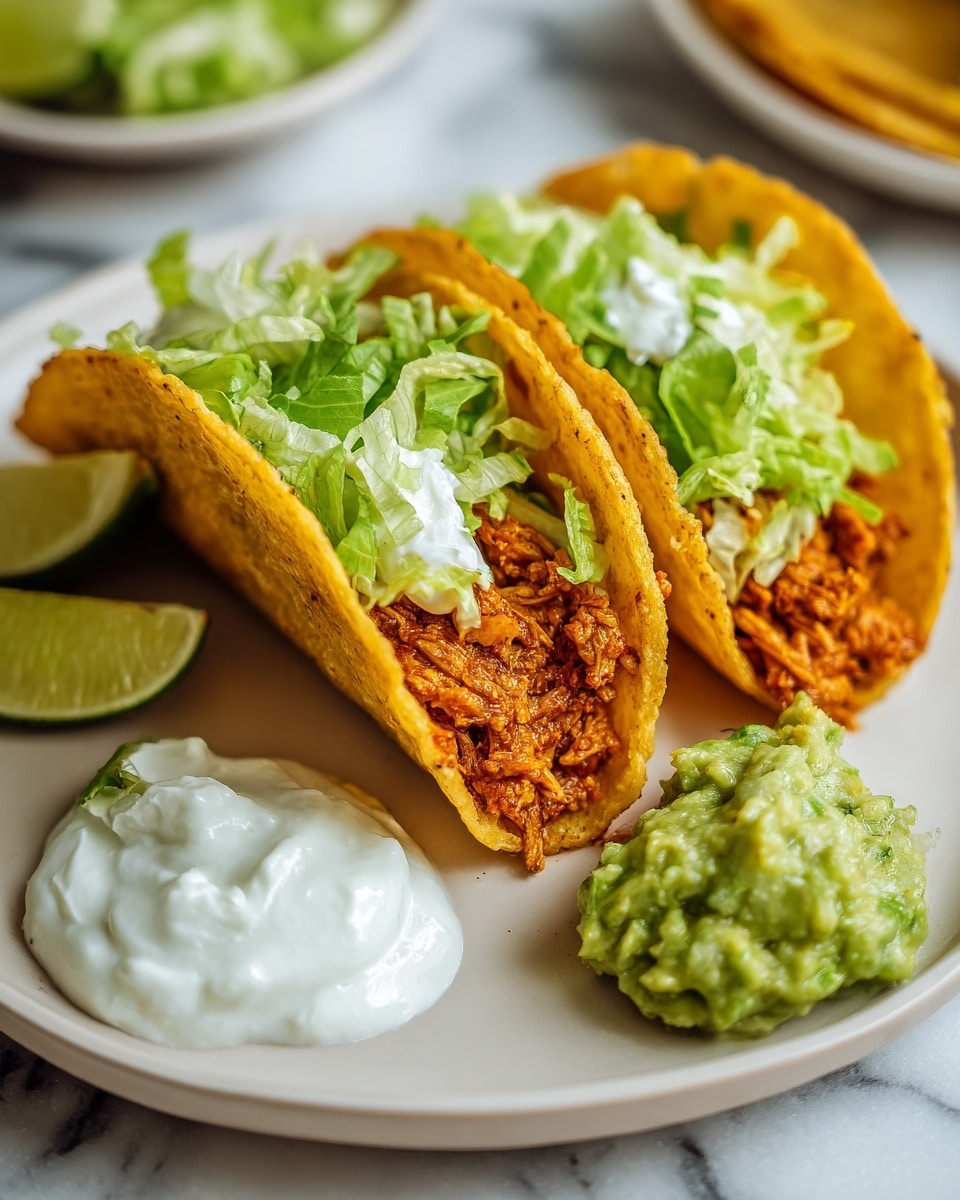
- Step 8: On half of each tortilla, sprinkle about a tablespoon of shredded cheese. Top with approximately 2½ tablespoons of the ground chicken mixture, then add a little more shredded cheese on top.
- Step 9: Bake the assembled tacos for 5 minutes, then remove them and carefully fold each taco over so the filling is enclosed. Return the folded tacos to the oven and bake for an additional 13 to 15 minutes until golden and crispy. Serve immediately with your favorite sides and enjoy!
Tips & Variations
- For extra flavor, add a squeeze of lime juice or fresh cilantro before serving.
- Substitute ground turkey or beef if preferred.
- Use different cheeses like Monterey Jack or a Mexican blend for varied taste.
- If you like spicy food, add chopped jalapeños to the chicken mixture.
Storage
Store leftover baked tacos in an airtight container in the refrigerator for up to 3 days. To reheat, warm them in the oven at 350°F (175°C) for about 10 minutes to keep the tortillas crispy. Microwaving may soften the shells.
How to Serve
Serve this delicious recipe with your favorite sides.
FAQs
Can I prepare the filling ahead of time?
Yes, you can cook the chicken filling a day ahead and refrigerate it. Assemble and bake the tacos just before serving for the best texture.
What type of cheese works best for these tacos?
Cheeses that melt well like cheddar, Monterey Jack, or a Mexican cheese blend are ideal for these baked tacos, providing creamy flavor and stretchiness.
Print
Baked Ground Chicken Tacos Recipe
- Total Time: 50 minutes
- Yield: 5 servings 1x
Description
These Baked Ground Chicken Tacos are a flavorful and easy-to-make meal perfect for weeknight dinners. Ground chicken seasoned with classic taco spices is simmered in a savory sauce, then layered with shredded cheese inside warm corn tortillas and baked until crispy and melty. The result is a delicious handheld taco with a perfect balance of juicy meat and cheesy goodness.
Ingredients
Main Ingredients
- 3 tablespoons oil (divided into 1 tbsp and 2 tbsp)
- 1 small onion, finely diced
- ½ teaspoon salt
- 1 tablespoon minced garlic
- 1 pound ground chicken
- 3 tablespoons taco seasoning
- 1 teaspoon paprika
- 1 teaspoon garlic powder
- ¾ cup low sodium chicken broth
- ½ cup salsa
- 15 corn tortillas (white or yellow)
- 2 to 2½ cups shredded cheese
Instructions
- Preheat Oven: Heat the oven to 400°F (205°C) and line two sheet pans with parchment paper to prepare for baking the tacos.
- Sauté Onions and Garlic: In a large skillet, heat 1 tablespoon of oil over medium heat. Add the finely diced onions and sauté for 2 to 3 minutes until translucent. Add salt and minced garlic, cooking for another minute until fragrant.
- Cook Ground Chicken: Add the ground chicken to the skillet and cook for 2 to 3 minutes, breaking the meat apart with a spatula until browned but not fully cooked through.
- Season Chicken: Sprinkle the taco seasoning, paprika, and garlic powder over the meat. Stir quickly to combine, coating the chicken evenly without needing a perfect mix.
- Add Liquids and Simmer: Pour in the chicken broth and salsa. Stir to combine all ingredients. Reduce the heat to medium-low and let it simmer for 4 to 5 minutes, allowing the sauce to reduce to your desired thickness.
- Warm Tortillas: While the meat simmers, warm the tortillas by wrapping them in a slightly damp towel and microwaving on high for 60 seconds, or wrapping them in foil and baking for 10 minutes in the oven.
- Prepare Tortillas for Baking: Place the warmed tortillas on the parchment-lined sheet pans. Brush or spray one side of each tortilla with olive oil, then flip so the oiled side is on the bottom.
- Assemble Tacos: On half of each tortilla, sprinkle about a tablespoon of shredded cheese. Top with approximately 2½ tablespoons of the ground chicken mixture, then add a little more shredded cheese on top of the meat.
- Bake Tacos: Bake the assembled tacos in the oven for 5 minutes until the cheese starts to melt. Remove them from the oven, gently fold each taco by flipping the filled side over the empty side, and return to the oven to bake for an additional 13 to 15 minutes until the tortillas are crispy and golden.
- Serve: Remove tacos from the oven and serve immediately with your favorite sides. Enjoy the flavorful baked chicken tacos fresh and hot!
Notes
- You can substitute ground turkey or beef if preferred.
- For spicier tacos, add chopped jalapeños or a few dashes of hot sauce to the meat mixture.
- Feel free to use any shredded cheese blend such as cheddar, Monterey Jack, or Mexican blend.
- Leftover tacos can be stored in the refrigerator for up to 3 days and reheated in the oven for best texture.
- Make sure to not overfill the tortillas to prevent breaking during baking.
- Prep Time: 15 minutes
- Cook Time: 35 minutes
- Category: Main Course
- Method: Baking
- Cuisine: Mexican
Keywords: baked chicken tacos, ground chicken tacos, easy taco recipe, oven baked tacos, Mexican chicken tacos, cheesy tacos, weeknight dinner


