
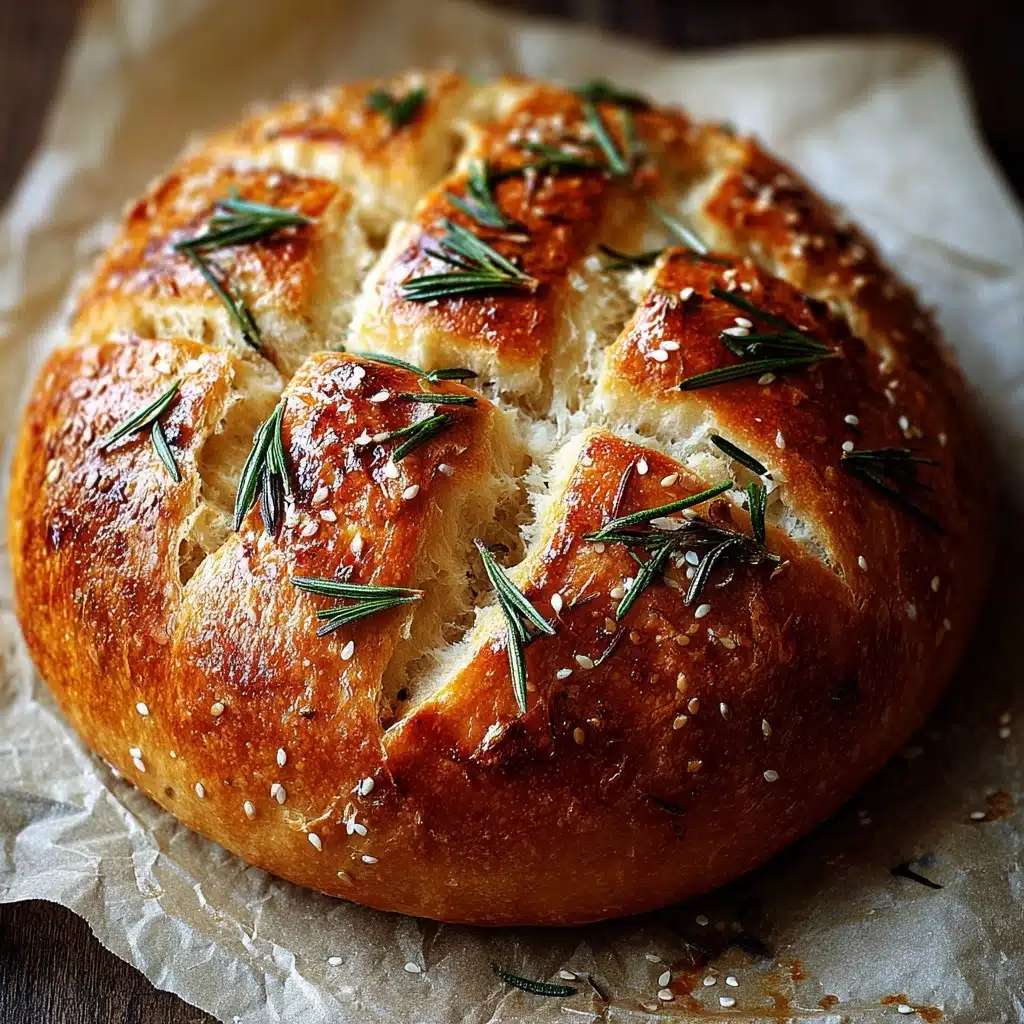
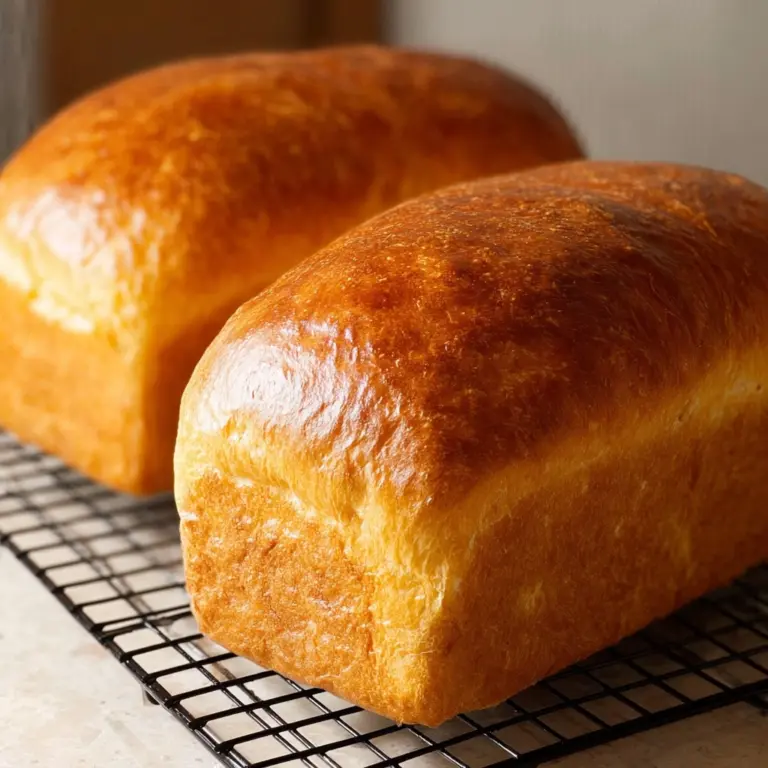
Easy Roasted Garlic Rosemary Artisan Bread Recipe
If you’ve ever wanted to impress your friends with a stunning, flavorful loaf that tastes like it came from a rustic bakery, then you are going to love this recipe. The Easy Roasted Garlic Rosemary Artisan Bread – The Best Homemade Loaf is a celebration of simple, fresh ingredients transforming into a crusty, aromatic masterpiece. This loaf brings all the charm of artisan baking right into your kitchen, delivering rich roasted garlic sweetness and fragrant rosemary with every bite, making it a deeply satisfying and cozy bread to share or savor alone.

Ingredients You’ll Need
As you get ready to make your artisan bread, you’ll notice how straightforward the ingredients are yet each one plays an invaluable role. From the fragrant rosemary that lifts the flavor to the roasted garlic that melts into the crumb, these basics come together to create magic.
- Whole head garlic: Roasting softens and sweetens the garlic for mellow, rich flavor in the dough.
- Extra-virgin olive oil: Adds moisture and subtle fruitiness, helping the crust crisp beautifully.
- Coarse sea salt & freshly ground black pepper: Season with balanced brightness and depth in both dough and roasted garlic.
- Water (room temperature): Activates the yeast gently, encouraging a slow, tasty rise.
- Active dry yeast: The fermenting magic that gives the bread its airy structure and light chew.
- Bread or all-purpose flour: Forms the base; bread flour adds strength while all-purpose keeps it tender.
- Dried oregano: A subtle herbal note that complements the rosemary and garlic.
- Kosher or fine sea salt: Seasoning the dough to enhance every undertone.
- Fresh rosemary: Adds earthy, pine-like fragrance and flavor that shines throughout the loaf.
- Smashed roasted garlic cloves: Infuse the dough with that irresistible roasted garlic essence.
How to Make Easy Roasted Garlic Rosemary Artisan Bread Recipe
Step 1: Roast the Garlic
Start by preheating your oven to 400°F (204°C). Cut the whole head of garlic in half horizontally to expose the cloves. Drizzle with a bit of olive oil, sprinkle generously with coarse salt and pepper, then wrap it tightly in foil. Roast for 40 minutes until the cloves soften and sweeten into a golden caramelized delight. Let it cool before squeezing the cloves out of their skins.
Step 2: Mix the Dough
In a small bowl, dissolve your active dry yeast in room temperature water, then let it sit for 10 to 15 minutes until it gets foamy and alive. In a larger bowl, mix your flour, kosher salt, dried oregano, and fresh rosemary. Add the roasted garlic cloves, olive oil, and the yeast water to the dry ingredients. Use a spatula to stir everything until the dough comes together into a sticky, shaggy ball. This is where the magic begins!
Step 3: First Rise
Cover your dough bowl with a clean kitchen towel and let it rise at room temperature for 8 to 10 hours—yes, it takes time, but that slow rise develops the flavor and texture that make this loaf outstanding. You’ll know it’s ready when it’s roughly doubled in size and billowy to the touch.
Step 4: Shape and Cold Ferment
Turn your dough gently onto a generously floured surface to avoid sticking. Shape it into a smooth ball by folding the edges under thoughtfully without overworking. Place it seam-side up in a floured bowl or banneton if you have one, cover, and let it rest in the fridge from 1 up to 24 hours. If you’re patient, 48 hours is even better for an incredibly deep flavor!
Step 5: Preheat Oven & Score
About 45 minutes before baking, preheat your oven to 450°F (232°C) with a Dutch oven inside—this creates the steamy, hot environment your bread needs for that sublime crust. Pull your dough from the fridge, invert it seam-side down onto parchment paper, and score the top using a sharp blade or lame. These beautiful cuts allow your loaf to bloom during baking.
Step 6: Bake
Carefully lift the parchment and dough into the preheated Dutch oven, cover with the lid, and bake for 30 minutes. The lid traps steam which keeps the crust supple enough to expand, then after lifting the lid, bake an additional 15 to 20 minutes to crisp and brown the exterior to golden perfection.
Step 7: Cool & Slice
Once baked, remove your treasure from the Dutch oven and let it cool on a wire rack for at least an hour. Cooling fully is key to letting the crumb set, so don’t skip this step before slicing. Then, enjoy that crunchy crust and pillowy interior with your favorite accompaniments.
How to Serve Easy Roasted Garlic Rosemary Artisan Bread Recipe
Garnishes
To amplify the flavor, brush the warm crust with a little extra virgin olive oil or melted herb-infused butter right after baking. Sprinkle lightly with flaky sea salt or even more fresh rosemary. These subtle touches make each slice even more irresistible.
Side Dishes
This artisan bread is a perfect partner to hearty soups, vibrant salads, or rustic cheese boards. Think creamy tomato soup, roasted vegetable medleys, or sharp manchego—all pairs that let the bread’s garlicky, rosemary notes shine.
Creative Ways to Present
Turn this bread into the star of your next brunch by slicing it thick and topping with smashed avocado, a drizzle of chili oil, or whipped ricotta and honey. Or toast slices for crostini topped with marinated olives and sun-dried tomatoes for a beautiful appetizer that your guests will rave about.
Make Ahead and Storage
Storing Leftovers
If you have any leftovers, keep the bread in a paper bag or wrapped loosely in a clean kitchen towel at room temperature. This helps maintain the crust’s crispness while keeping the inside tender. Avoid plastic bags which trap moisture and can make the crust soggy.
Freezing
To enjoy your artisan loaf later, slice it first and freeze in an airtight container or freezer bag. This frees you to toast just what you need without thawing the whole loaf. Frozen slices keep well for up to 3 months.
Reheating
For perfectly refreshed bread, pop slices in a toaster or oven at 350°F (177°C) for 5 to 10 minutes until warm and crisp again. If reheating the whole loaf, tent it with foil in the oven to warm through without drying out the crumb.
FAQs
Can I use all-purpose flour instead of bread flour?
Absolutely! All-purpose flour works well and will give a slightly softer texture, while bread flour produces a chewier loaf with more structure. Either option yields a delicious result.
Why do I need to refrigerate the dough overnight?
Cold fermentation slows down yeast activity, developing more complex flavors and improving crumb texture. This step is key for turning your bread from good to unforgettable.
Can I skip roasting the garlic?
While you can add raw garlic, roasting it mellows the sharpness and brings out sweetness, making the bread taste much more balanced and aromatic. It’s worth the extra step!
What is the purpose of scoring the bread before baking?
Scoring controls how the bread expands in the oven, preventing cracks and giving it that classic artisan appearance. It also lets steam escape, improving crust development.
Do I need a Dutch oven to bake this bread?
Using a Dutch oven creates steam which is crucial for a crusty exterior. You can bake on a baking stone or sheet, but you’ll get a different crust and less rise without the sealed environment.
Final Thoughts
I just can’t recommend making y Artisan Bread – The Best Homemade Loaf enough. It’s incredible how a handful of humble ingredients can come alive with just a little patience and care. Baking this bread is a comforting ritual with a seriously tasty payoff that’s perfect for any occasion. So grab your garlic and rosemary, embrace the delicious process, and get ready to fall in love with your homemade artisan loaf!
Print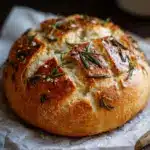
Easy Roasted Garlic Rosemary Artisan Bread Recipe
- Total Time: 9 to 11 hours (including rises and chilling)
- Yield: 1 loaf (about 10 slices) 1x
- Diet: Vegetarian
Description
This Easy Roasted Garlic Rosemary Artisan Bread is a fragrant and flavorful homemade loaf featuring roasted garlic and fresh rosemary. Perfectly crusty on the outside with a tender, airy crumb inside, this bread is great for sandwiches, soups, or simply enjoyed with butter.
Ingredients
For the Bread Dough:
- 1 whole head garlic
- 1 tablespoon extra-virgin olive oil, divided
- Coarse sea salt & freshly ground black pepper, to taste
- 1½ cups water (room temperature, ~70°F / 21°C)
- 1 teaspoon active dry yeast
- 3 cups bread or all-purpose flour (plus more for dusting)
- ½ teaspoon dried oregano
- 1 teaspoon kosher or fine sea salt
- 2 teaspoons finely chopped fresh rosemary (plus more for topping)
- Cloves from 1 head roasted garlic, smashed
Instructions
- Roast the Garlic: Preheat your oven to 400°F (204°C). Cut the garlic head in half horizontally to expose the cloves, drizzle with half of the olive oil, sprinkle with coarse sea salt and freshly ground black pepper, and wrap tightly in aluminum foil. Roast in the preheated oven for about 40 minutes until soft and fragrant. Let cool, then carefully remove the roasted garlic cloves from their skins.
- Mix the Dough: In a small bowl, dissolve the yeast in the room temperature water and let it activate for 10 to 15 minutes until foamy. Meanwhile, in a large mixing bowl, combine the flour, kosher salt, dried oregano, and chopped fresh rosemary. Add the activated yeast water, the smashed roasted garlic cloves, and the remaining olive oil. Stir everything together using a spatula until a sticky dough forms.
- First Rise: Cover the bowl with a clean kitchen towel and let the dough rise at room temperature for 8 to 10 hours, or until it has doubled in size and developed a bubbly, airy texture.
- Shape and Cold Ferment: Lightly flour a clean surface and gently turn the dough out onto it. Shape the dough into a round ball without deflating it too much. Place the dough seam-side up in a floured bowl or proofing basket, cover with plastic wrap or a towel, and refrigerate for 1 to 24 hours (or up to 48 hours for a deeper flavor).
- Preheat Oven & Score: When ready to bake, preheat your oven to 450°F (232°C) with a Dutch oven inside to heat up. Remove the dough from the fridge and invert it onto a sheet of parchment paper so the seam side is down. Use a sharp blade or bread lame to score the top of the dough with slashes to allow for expansion during baking.
- Bake: Carefully transfer the dough on the parchment paper into the hot Dutch oven. Cover with the lid and bake for 30 minutes to trap steam, which promotes a crisp crust. After 30 minutes, remove the lid and bake for an additional 15 to 20 minutes until the crust is deeply golden brown and crisp.
- Cool & Slice: Remove the bread from the Dutch oven and place on a wire rack. Let cool completely, at least 1 hour, before slicing. This resting time ensures the crumb sets perfectly and the flavors fully develop.
Notes
- Using a Dutch oven creates steam that is crucial for a crispy crust, but if you don’t have one, you can bake on a preheated baking stone and add a pan of water to the oven to create steam.
- Cold fermentation enhances flavor complexity, so don’t rush the chilling stage if you can plan ahead.
- Feel free to experiment with additional herbs or toppings like sesame seeds or flaky sea salt.
- If fresh rosemary is not available, increase dried rosemary slightly but avoid overpowering the bread.
- Prep Time: 20 minutes
- Cook Time: 50 minutes
- Category: Bread
- Method: Roasting, Fermentation, Baking
- Cuisine: Artisan
Nutrition
- Serving Size: 1 slice (1/10th of loaf)
- Calories: 180
- Sugar: 1g
- Sodium: 220mg
- Fat: 3g
- Saturated Fat: 0.4g
- Unsaturated Fat: 2g
- Trans Fat: 0g
- Carbohydrates: 35g
- Fiber: 2g
- Protein: 5g
- Cholesterol: 0mg
Keywords: roasted garlic bread, rosemary bread, homemade artisan bread, easy bread recipe, no-knead bread


