
Red Velvet Earthquake Cake Recipe
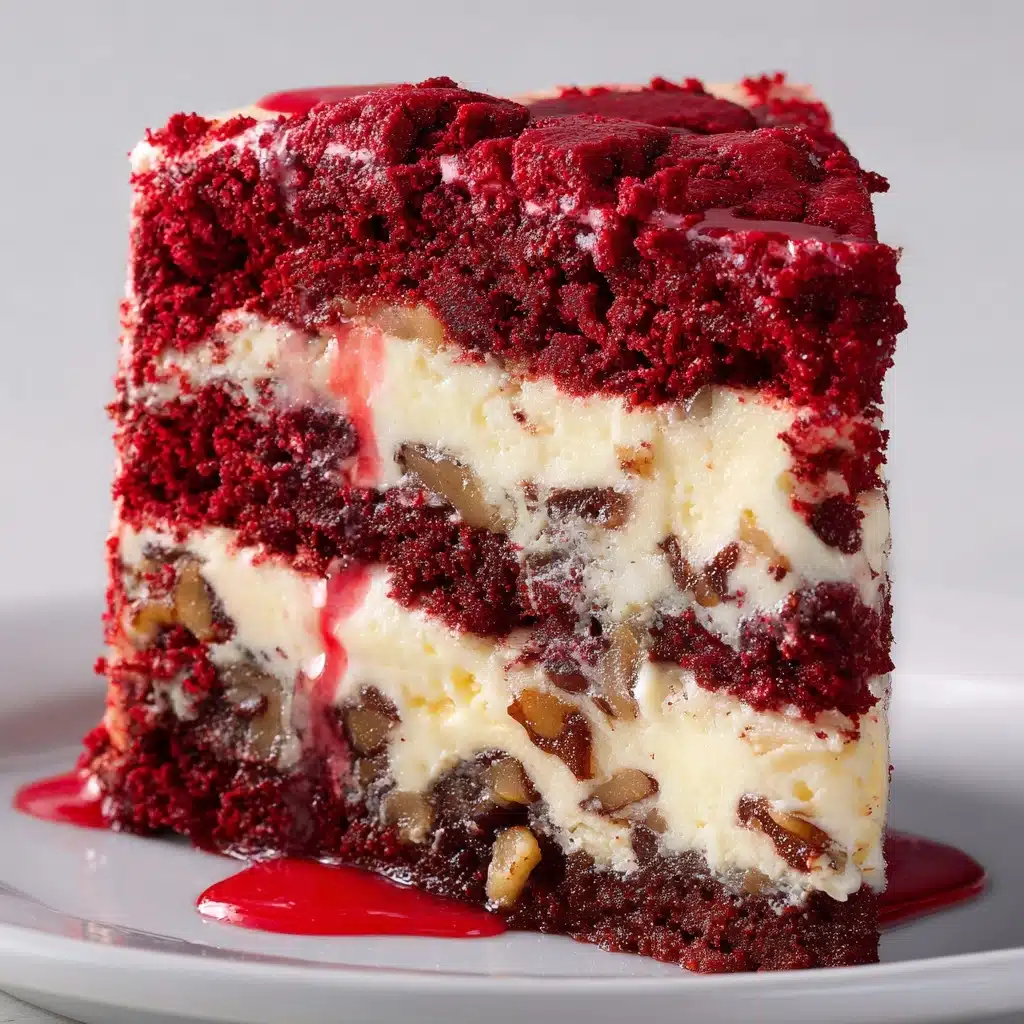
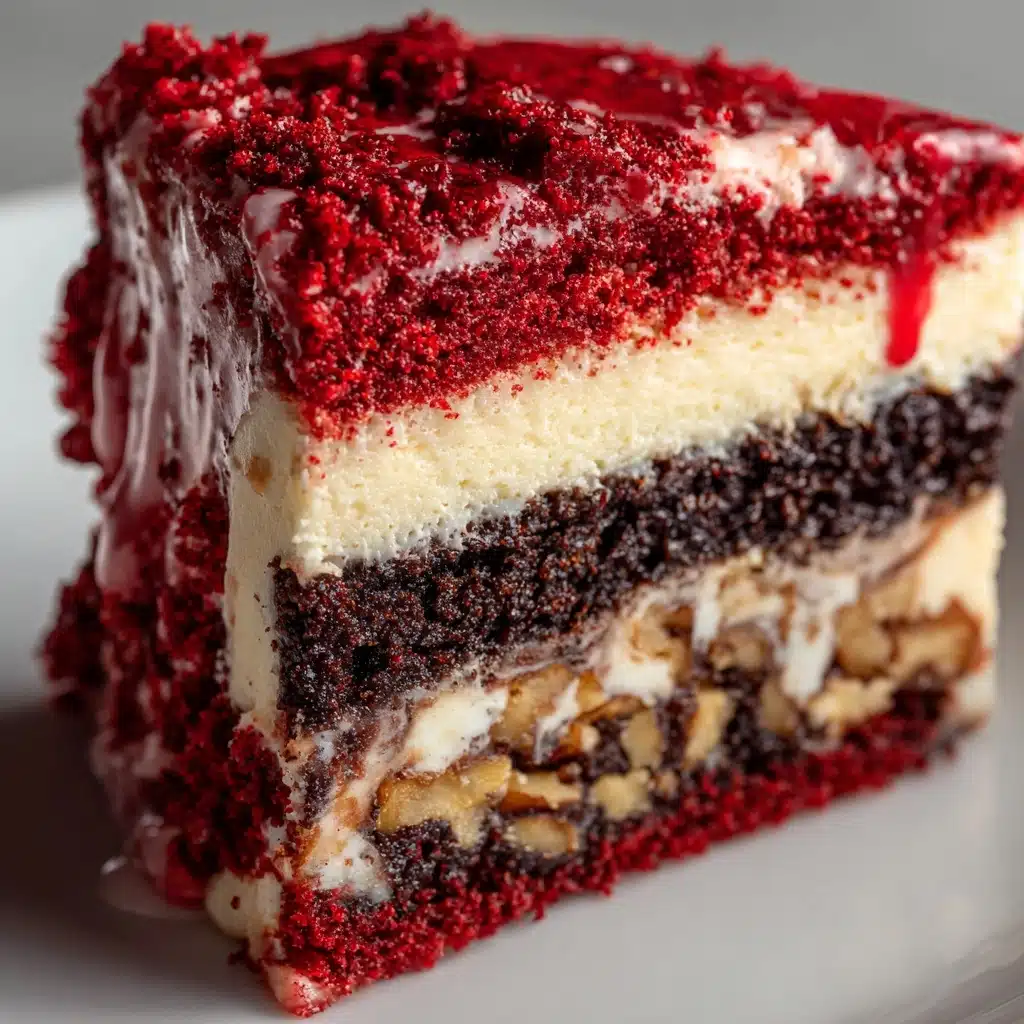
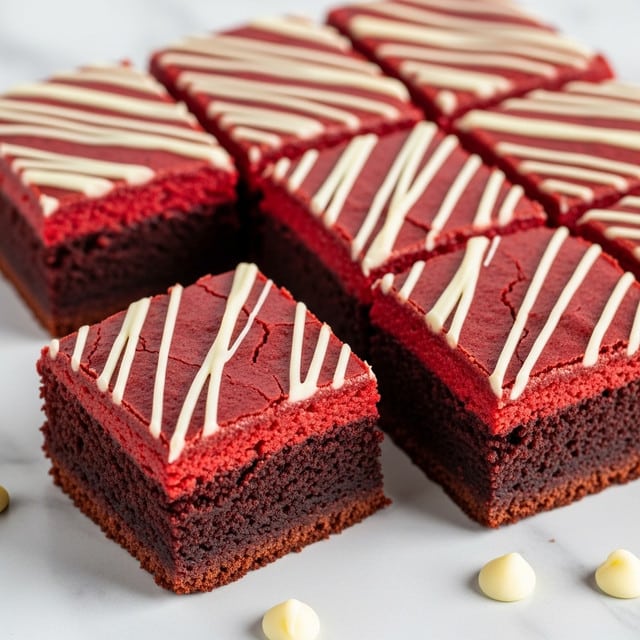
The Red Velvet Earthquake Cake is one spectacular treat that brings together the rich, velvety flavor of red velvet cake with a deliciously nutty and chocolatey surprise hidden at the bottom. Imagine biting into layers of moist cake topped with a luscious cream cheese glaze, with pecans, coconut, and chocolate chips creating a delightful “earthquake” effect that erupts with texture and flavor in every bite. Whether you’re baking for a special occasion or just want to wow your friends and family, this show-stopping dessert will quickly become a beloved favorite.
Ingredients You’ll Need
This Red Velvet Earthquake Cake relies on simple, everyday ingredients that each play an important role in creating its unforgettable taste and texture. From the rich red velvet cake mix that gives it that iconic color and flavor, to the crunchy pecans and sweet coconut that form the delightful “earthquake” layer, every element complements each other perfectly.
- Red Velvet cake mix: The foundation that provides the signature rich, cocoa-kissed flavor and beautiful red hue.
- Coconut (1 cup): Adds a natural sweetness and chewy texture that pops against the cake’s softness.
- Pecans, chopped (1 1/2 cups): For a buttery crunch that balances the sweet layers perfectly.
- Chocolate chips (12 oz.): Melt into gooey pockets of chocolate delight for an irresistible surprise.
- Cream cheese (8 oz.): Creates a silky smooth glaze that pairs beautifully with the cake.
- Unsalted butter (1/2 cup, or 1 stick): Contributes richness to the glaze without overpowering the other flavors.
- Powdered sugar (4 cups): Sweetens and thickens the cream cheese mixture into a luscious topping.
How to Make Red Velvet Earthquake Cake
Step 1: Prep the Oven and Pan
Start by preheating your oven to 350 degrees Fahrenheit and greasing a 9×13-inch baking dish, then lightly flour it to ensure your cake doesn’t stick. This simple prep work sets the stage for a smooth baking experience and a cake that releases beautifully from the pan.
Step 2: Create the “Earthquake” Layer
Sprinkle the chopped pecans evenly across the bottom of your prepared dish, followed by a layer of shredded coconut, and then scatter the chocolate chips on top. This trio will settle into the bottom as the cake bakes, creating a delightful mix of crunchy, chewy, and melty surprises beneath the cake’s surface.
Step 3: Prepare the Cake Batter
Mix the red velvet cake batter exactly as the package instructs, ensuring the right consistency and flavor. Then spread the batter gently over the layered nuts, coconut, and chocolate chips, covering them completely but without mixing them in. This layering is key to getting that signature “earthquake” effect.
Step 4: Make the Cream Cheese Glaze
In a small saucepan over low to medium heat, melt together the cream cheese and butter until smooth and creamy. Once off the heat, whisk in the powdered sugar until it forms a thick, luscious glaze. This rich topping elevates the cake, adding smoothness and sweetness that perfectly contrasts the textured layers below.
Step 5: Assemble and Bake
Spread the cream cheese glaze evenly over the top of the cake batter in your dish, smoothing it out with a spatula. Bake uncovered for 30 minutes, then tent the cake with foil to prevent the glaze from browning too much, continuing to bake for another 30 to 45 minutes or until a toothpick inserted near the center comes out clean. This careful baking process ensures everything comes together perfectly.
Step 6: Cool and Serve
Once out of the oven, let the Red Velvet Earthquake Cake cool completely in the pan before cutting into squares. Cooling helps the glaze set firmly, making each slice hold its shape and revealing the dramatic layers that make this cake such a joy to eat.
How to Serve Red Velvet Earthquake Cake
Garnishes
For an extra touch of elegance, sprinkle a few extra chopped pecans or a dusting of powdered sugar on top just before serving. Fresh berries also complement the rich flavors wonderfully, adding a bright, fresh note to each bite.
Side Dishes
This cake pairs beautifully with a simple scoop of vanilla ice cream or a dollop of freshly whipped cream, both of which add a creamy contrast to the richly textured cake. A cup of bold coffee or a smooth glass of milk can also make fantastic companions to balance the sweetness.
Creative Ways to Present
If you want to impress at your next gathering, cut the cake into small bite-sized squares and serve on a tiered stand for a sophisticated dessert display. Alternatively, layer pieces of the cake with whipped cream and berries in clear glasses to create show-stopping parfaits that highlight the cake’s vibrant color and texture.
Make Ahead and Storage
Storing Leftovers
After enjoying this incredible Red Velvet Earthquake Cake, be sure to cover any leftovers tightly to keep them moist and flavorful. Room temperature storage works for up to two days, but be mindful that the cream cheese glaze tastes best when fresh or chilled.
Freezing
You can freeze leftover cake by wrapping individual slices tightly in plastic wrap and placing them in an airtight container or freezer bag. Frozen Red Velvet Earthquake Cake will maintain its quality for up to three months and thaw beautifully for a quick dessert fix.
Reheating
Reheat slices gently in the microwave for about 20 to 30 seconds to bring back the cake’s soft texture without melting the glaze too much. Alternatively, let the slice come to room temperature naturally for the best flavor experience.
FAQs
What makes the cake “earthquake” style?
The “earthquake” effect comes from the layers of pecans, coconut, and chocolate chips that settle at the bottom of the cake during baking, creating a dramatic mixture of textures that “erupt” with every bite.
Can I use homemade red velvet cake batter instead of the mix?
Absolutely! Homemade batter will work wonderfully, and you can customize the flavor to your liking, but the boxed mix keeps this recipe quick and easy without sacrificing the classic red velvet taste.
Is it necessary to tent the cake with foil during baking?
Yes, tenting the cake after the first 30 minutes protects the cream cheese glaze from browning too much while allowing the cake to finish baking evenly.
Can I substitute the pecans with another nut?
Definitely. Walnuts or almonds are great alternatives if pecans aren’t your favorite or if you want a different crunch profile.
How long does the cake stay fresh?
When stored properly, the cake stays moist and delicious for up to two days at room temperature and up to five days in the fridge.
Final Thoughts
There is something truly magical about the Red Velvet Earthquake Cake that makes it more than just a dessert—it’s a conversation starter, a crowd-pleaser, and a comforting celebration all in one. I hope you give this recipe a try and get to experience the joy that comes from enjoying those rich red layers and the surprising nutty, chocolatey “earthquake” beneath. Your taste buds are in for an unforgettable treat!
Print
Red Velvet Earthquake Cake Recipe
- Total Time: 1 hour 35 minutes
- Yield: 12 to 16 servings 1x
- Diet: Vegetarian
Description
This Red Velvet Earthquake Cake is a rich, decadent dessert featuring a layer of crunchy pecans, coconut, and chocolate chips beneath moist red velvet cake batter topped with a creamy cream cheese and powdered sugar mixture. The multi-layered texture and vibrant red color make it a show-stopping treat perfect for gatherings and festive occasions.
Ingredients
Dry Ingredients
- 1 red velvet cake mix
- 4 cups powdered sugar
Nut and Fruit Layer
- 1 cup shredded coconut
- 1 1/2 cups chopped pecans (measured after chopping)
- 12 oz package chocolate chips
Cream Cheese Topping
- 8 oz cream cheese
- 1/2 cup unsalted butter (1 stick)
Instructions
- Preheat Oven: Preheat your oven to 350°F (175°C) to prepare for baking the cake.
- Prepare Baking Dish: Grease and flour a 9×13-inch baking dish to ensure the cake doesn’t stick after baking.
- Layer Nuts, Coconut, and Chocolate: Evenly spread the chopped pecans, shredded coconut, and chocolate chips on the bottom of the prepared dish, creating a crunchy and sweet base layer.
- Mix Cake Batter: Prepare the red velvet cake mix according to the package instructions, ensuring the batter is smooth and well combined.
- Spread Cake Batter: Carefully spread the prepared cake batter evenly over the chocolate chip layer in the baking dish.
- Melt Butter and Cream Cheese: In a small saucepan, melt the unsalted butter and cream cheese over low to medium heat, stirring frequently until fully combined and smooth.
- Remove from Heat: Take the saucepan off the heat to prevent the mixture from burning or curdling.
- Add Powdered Sugar: Gradually whisk the powdered sugar into the melted butter and cream cheese mixture until it becomes a smooth, thick frosting.
- Top the Cake Batter: Spread the cream cheese and powdered sugar mixture evenly over the cake batter in the baking dish.
- Smooth Top: Use a spatula to smooth out the top layer for even baking.
- Bake Initially: Place the cake in the oven and bake for 30 minutes at 350°F (175°C).
- Tent with Foil: After 30 minutes, tent the cake loosely with aluminum foil to prevent excessive browning on top.
- Continue Baking: Bake for an additional 30 to 45 minutes until a toothpick inserted into the center comes out clean, indicating the cake is done.
- Cool Completely: Remove the cake from the oven and let it cool completely in the pan to allow layers to set before cutting.
- Store Cake: Cover the cake tightly with plastic wrap or foil to maintain freshness.
- Refrigerate After 2 Days: Store the cake in the refrigerator after two days to prolong freshness and prevent spoilage.
Notes
- For best results, measure the pecans after chopping to ensure accurate quantities.
- Allow the cake to cool completely before slicing to retain the layering effect.
- Tenting with foil midway through baking prevents over-browning of the top layer.
- The cake can be stored at room temperature for up to two days; refrigerate afterward.
- If you prefer a less sweet topping, reduce the powdered sugar slightly but keep at least 3 cups for texture.
- You can substitute the coconut with more pecans or walnuts if you prefer a nuttier texture.
- Prep Time: 20 minutes
- Cook Time: 1 hour 15 minutes
- Category: Dessert
- Method: Baking
- Cuisine: American
Nutrition
- Serving Size: 1 slice (1/16th of cake)
- Calories: 450 kcal
- Sugar: 40 g
- Sodium: 320 mg
- Fat: 28 g
- Saturated Fat: 12 g
- Unsaturated Fat: 14 g
- Trans Fat: 0.5 g
- Carbohydrates: 50 g
- Fiber: 2 g
- Protein: 5 g
- Cholesterol: 60 mg
Keywords: Red Velvet Earthquake Cake, red velvet cake, cream cheese topping, layered dessert, pecan cake, coconut dessert, chocolate chip cake


