
Orange Dreamsicle Fudge Recipe
Introduction
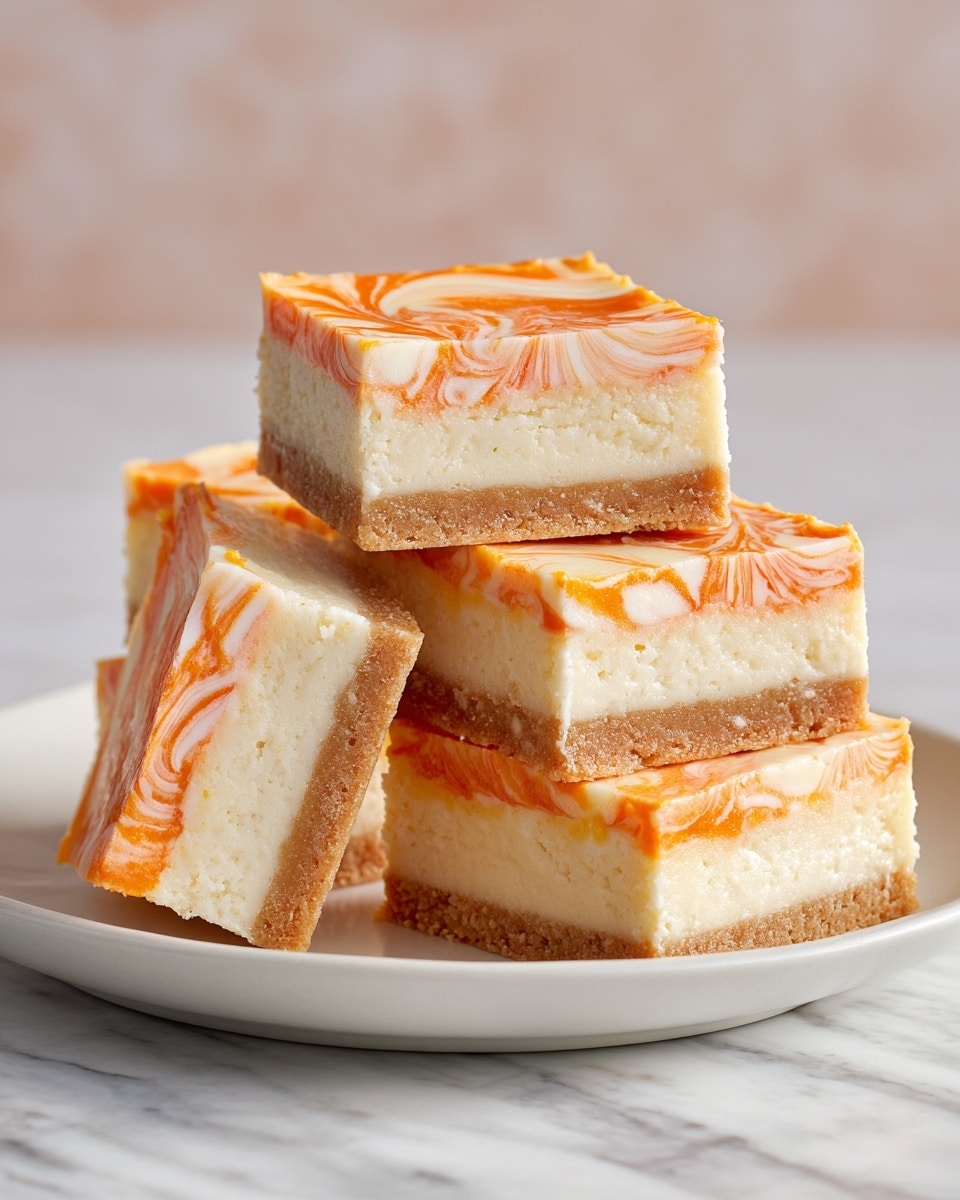
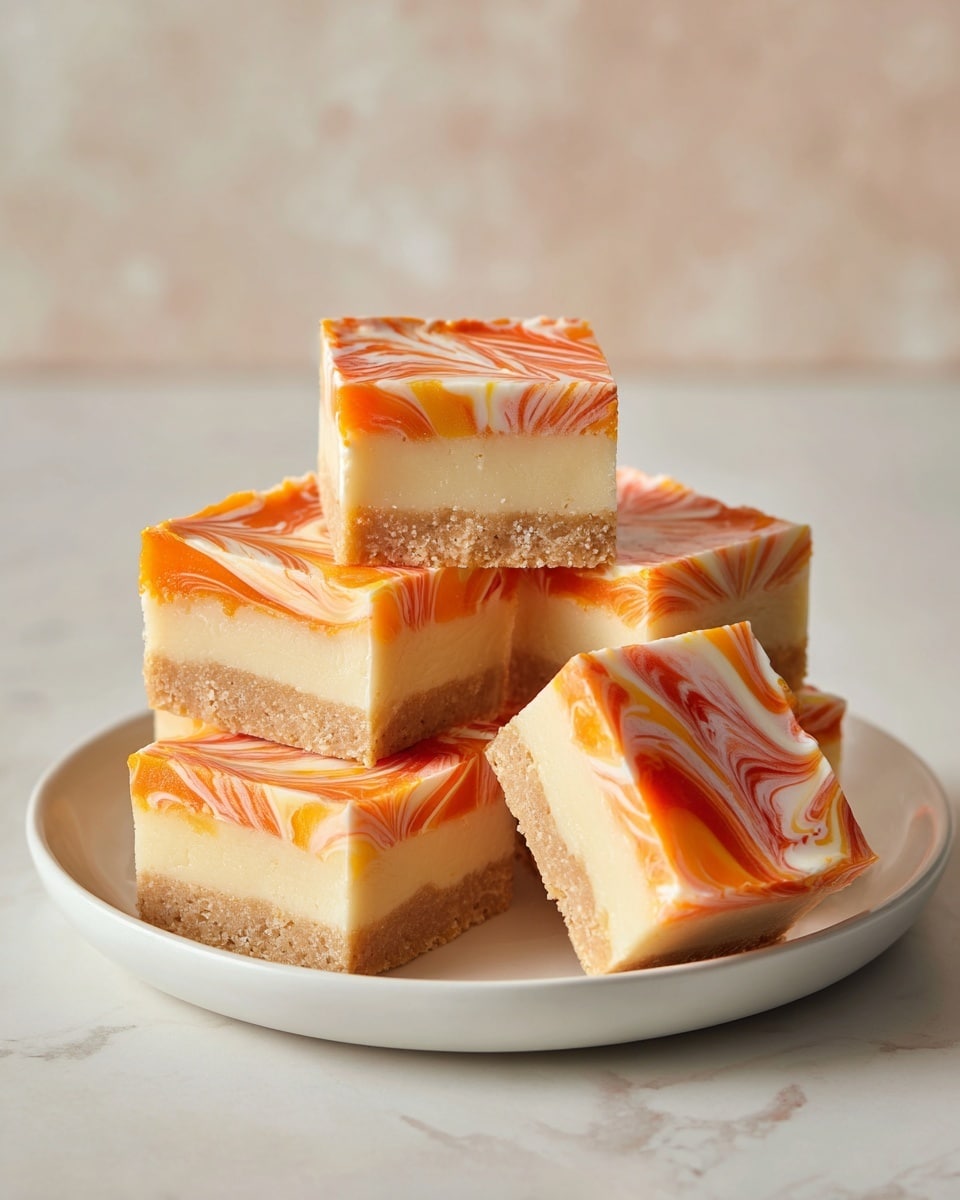
Orange Dreamsicle Fudge is a delightful treat that combines creamy white chocolate with bright orange flavors for a nostalgic twist on classic fudge. Its smooth texture and vibrant taste make it perfect for sharing or enjoying as a special indulgence.
Ingredients
- 2/3 cup heavy cream
- 3 cups granulated sugar
- 3/4 cup unsalted butter
- 7 oz. marshmallow cream
- 2 cups white chocolate chips
- 3 teaspoons orange extract
- Orange food coloring (up to 10 drops, based on preference)
Instructions
- Step 1: Grease a 9×13 inch baking pan and line it with parchment paper, making sure to cover all sides.
- Step 2: In a saucepan, combine the unsalted butter, 2/3 cup heavy cream, and granulated sugar. Stir over medium heat until the butter melts completely and the mixture is well blended.
- Step 3: Continue cooking the mixture until it reaches 235°F (softball stage). Once reached, stir continuously for 3 minutes.
- Step 4: Remove the saucepan from heat. Quickly stir in the marshmallow cream and white chocolate chips until the mixture becomes smooth and creamy.
- Step 5: Transfer about 1 cup of the fudge mixture into a separate bowl. To the remaining mixture in the saucepan, add the orange extract and orange food coloring. Mix thoroughly until you reach your desired color.
- Step 6: Pour the colored mixture evenly into the prepared pan.
- Step 7: Drop dollops of the reserved plain mixture over the orange layer. Use a butter knife to swirl the two mixtures together, creating a marble effect.
- Step 8: Refrigerate the pan for 2 hours or until the fudge sets properly.
- Step 9: Cut the fudge into squares and enjoy this bright, creamy dessert.
Tips & Variations
- For a stronger orange flavor, add an extra teaspoon of orange extract, but be careful not to overpower the sweetness.
- You can substitute white chocolate chips with vanilla-flavored baking chips if preferred.
- Swirling can be customized by using a toothpick for more detailed patterns.
- If you prefer a softer fudge, reduce the cooking temperature slightly to just below the softball stage.
Storage
Store the fudge in an airtight container at room temperature for up to one week or in the refrigerator for up to two weeks. To soften refrigerated fudge before serving, let it sit at room temperature for 10 to 15 minutes. Avoid freezing, as it can alter the texture.
How to Serve
Serve this delicious recipe with your favorite sides.
FAQs
Can I use fresh orange zest instead of orange extract?
Yes, fresh orange zest can be used for a natural citrus flavor, but it will be less concentrated than extract. Use about one tablespoon of zest for a lighter orange taste.
What does cooking to the softball stage mean?
The softball stage refers to heating sugar syrup to about 235°F, where a small amount dropped into cold water forms a soft, pliable ball. This is essential for achieving the right fudge texture.
Print
Orange Dreamsicle Fudge Recipe
- Total Time: 2 hours 25 minutes
- Yield: 36 squares 1x
Description
This Orange Dreamsicle Fudge brings together the creamy richness of white chocolate and marshmallow with a refreshing burst of orange flavor. Featuring a luscious, marbled texture from swirled orange-flavored fudge, this dessert is a nostalgic twist inspired by the classic orange creamsicle treat. Perfectly sweet and delightfully smooth, it’s a no-bake confection that sets in the fridge, making it an easy and impressive treat for any occasion.
Ingredients
Fudge Base Ingredients
- 2/3 cup heavy cream
- 3 cups granulated sugar
- 3/4 cup unsalted butter
- 7 oz marshmallow cream
- 2 cups white chocolate chips
Flavoring and Coloring
- 3 teaspoons orange extract
- Orange food coloring (up to 10 drops, based on preference)
Instructions
- Prepare the Pan: Grease a 9×13 inch baking pan and line it completely with parchment paper, covering all sides to ensure easy removal of the fudge later.
- Combine Base Ingredients: In a saucepan, combine unsalted butter, heavy cream, and granulated sugar. Stir the mixture constantly over medium heat until the butter melts completely and the ingredients are well blended.
- Cook to Softball Stage: Continue cooking the mixture while stirring until the temperature reaches 235°F (softball stage). Once reached, keep stirring for an additional 3 minutes to ensure proper consistency.
- Add Marshmallow and White Chocolate: Remove the saucepan from heat. Quickly stir in the marshmallow cream and white chocolate chips until the mixture turns smooth and creamy without lumps.
- Separate and Flavor Mixtures: Transfer about 1 cup of the white chocolate mixture into a separate bowl. To the remaining mixture in the saucepan, add the orange extract and up to 10 drops of orange food coloring. Stir thoroughly until the color and flavor are evenly distributed.
- Pour Base Layer: Pour the orange-flavored mixture evenly into the prepared pan, spreading it to cover all areas.
- Swirl Mixtures: Drop spoonfuls of the reserved white chocolate mixture over the orange base. Using a butter knife, gently swirl the two mixtures together to create an attractive marbled effect.
- Chill to Set: Place the pan in the refrigerator for 2 hours or until the fudge sets completely and firms up.
- Cut and Serve: Once set, lift the fudge out using the parchment paper, cut into squares, and enjoy this creamy, citrus-infused treat!
Notes
- Ensure the mixture reaches exactly 235°F for the perfect fudge texture; use a candy thermometer for accuracy.
- The orange food coloring amount can be adjusted to preference for a softer or more vibrant orange color.
- Use fresh orange extract for the best citrus flavor without added bitterness.
- Store fudge in an airtight container in the refrigerator for up to 2 weeks.
- Allow fudge to come to room temperature for a few minutes before eating for the best texture and flavor.
- Prep Time: 10 minutes
- Cook Time: 15 minutes
- Category: Dessert
- Method: Stovetop
- Cuisine: American
Keywords: Orange fudge, Dreamsicle fudge, White chocolate fudge, Orange creamsicle dessert, No bake fudge


