
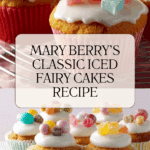
Mary Berry’s iced fairy cakes recipe
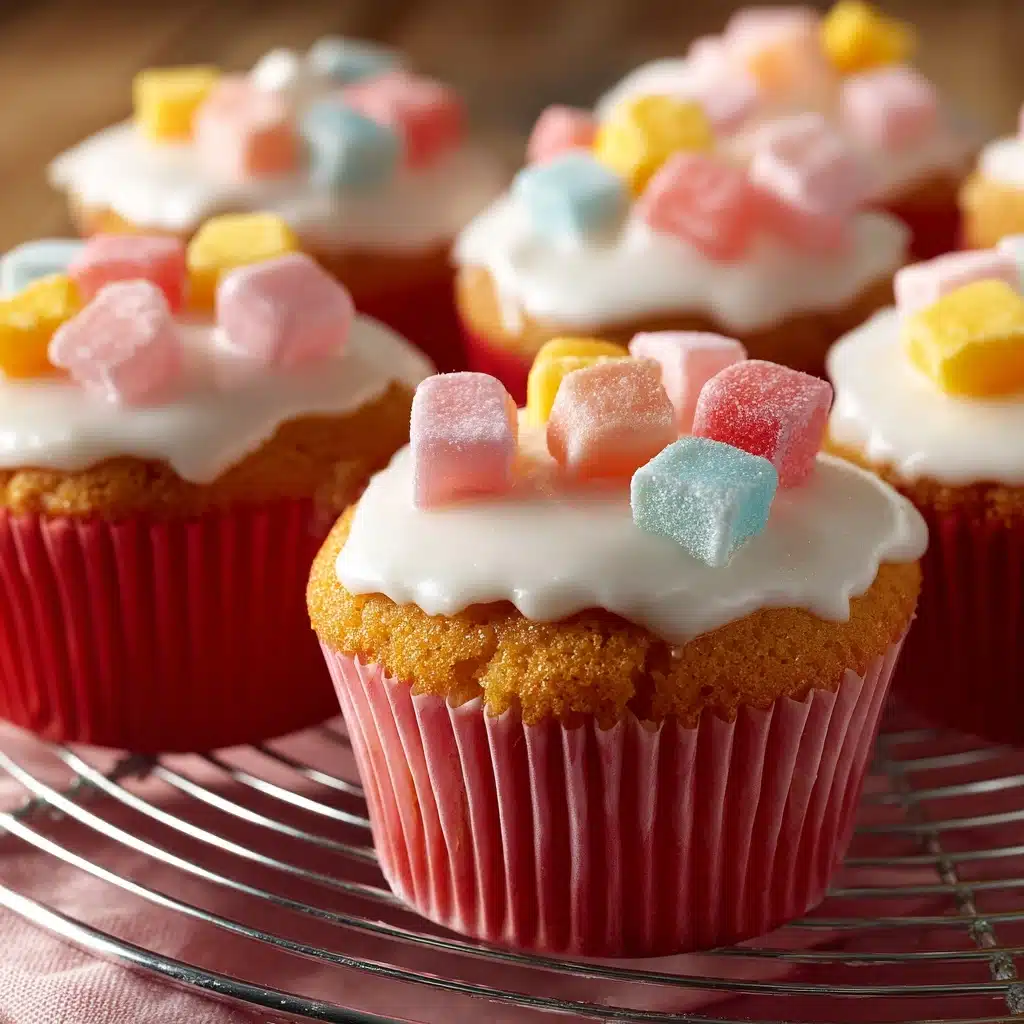
If you’ve ever wished for a treat that’s as pretty as it is delicious, Mary Berry’s iced fairy cakes recipe is the answer to your afternoon tea dreams. Imagine buttery sponge cakes, delicately golden and topped with a crisp, sweet layer of icing — irresistible to look at and even more delightful to eat. This classic British recipe brings a sprinkle of nostalgia with every bite, perfect for birthdays, celebrations, or simply brightening up your weekday routine. The light crumb, beautifully balanced sweetness, and decorations make each little cake its own miniature work of art. Whether you’re a seasoned baker or just eager to try something new, these fairy cakes will win you over, one whimsical bite at a time.
Ingredients You’ll Need
Simplicity is at the heart of Mary Berry’s iced fairy cakes recipe, with each ingredient playing a special role. These essentials ensure your cakes turn out soft, fluffy, and picture-perfect — just as Mary intended!
- Butter: Softened butter gives the cakes their rich, tender crumb and a lovely buttery flavor.
- Caster Sugar: This fine sugar dissolves quickly, ensuring a light, delicate sweetness in every bite.
- Eggs: Large eggs add essential moisture and help the cakes rise, giving them that dreamy lightness.
- Self-Raising Flour: The key to an effortless rise, this flour lightens up the fairy cakes and gives them their signature texture.
- Baking Powder: Just a touch helps the cakes puff up beautifully for perfectly domed fairy cakes.
- Icing Sugar (for decorating): Essential for that iconic glossy white icing — smooth, sweet and irresistible.
- Warm Water (for icing): This brings the icing sugar together into the perfect spreadable consistency.
- Sweets (for topping): The finishing flourish, adding color and a dash of playful fun to each cake.
How to Make Mary Berry’s iced fairy cakes recipe
Step 1: Prep Your Tin and Oven
Start by getting everything ready: Preheat your oven to 200°C (180°C fan) or gas mark 6. Place fairy cake cases into a 12-hole bun tin to help your cakes bake evenly and keep their adorable shape. If you don’t have a bun tin handy, you can line a baking tray — just know the cakes may spread a little more and not be as perfectly round, but they’ll still taste wonderful.
Step 2: Mix the Batter
Measure out the butter, caster sugar, eggs, self-raising flour, and baking powder into a large bowl. With an electric whisk or even just your trusty wooden spoon, beat everything together briskly for 2–3 minutes. You want a smooth, well-blended mixture. Use a tablespoon to scoop the batter into each case — this keeps the fairy cakes all a similar size, ensuring even baking for every one.
Step 3: Bake to Perfection
Pop the tray into your preheated oven and bake for 15–20 minutes. Keep an eye on them at the 15-minute mark to prevent any over-browning. Here’s the secret: try not to open the oven too soon or fling the door open, as a rush of cool air could cause your beautiful cakes to sink. When they’re golden and just firm, carefully lift them from the tin and let cool on a wire rack.
Step 4: Make the Icing
Once the fairy cakes are completely cooled, it’s time for the part everyone looks forward to — icing and decorating! Place icing sugar in a bowl, and gradually add warm water, stirring until you have a thick icing that will hold nicely on top. Spoon the icing over each cake, smoothing it for a neat finish but letting a few drips happen for that homemade charm.
Step 5: Decorate and Set
Top your cakes with your favorite sweets — think sprinkles, candies, or even a cherry if you’re feeling nostalgic. Let the icing set for 30 minutes so it firms up to the touch, or dive right in if you simply can’t resist. Every bite of these Mary Berry’s iced fairy cakes recipe masterpieces will make you smile!
How to Serve Mary Berry’s iced fairy cakes recipe
Garnishes
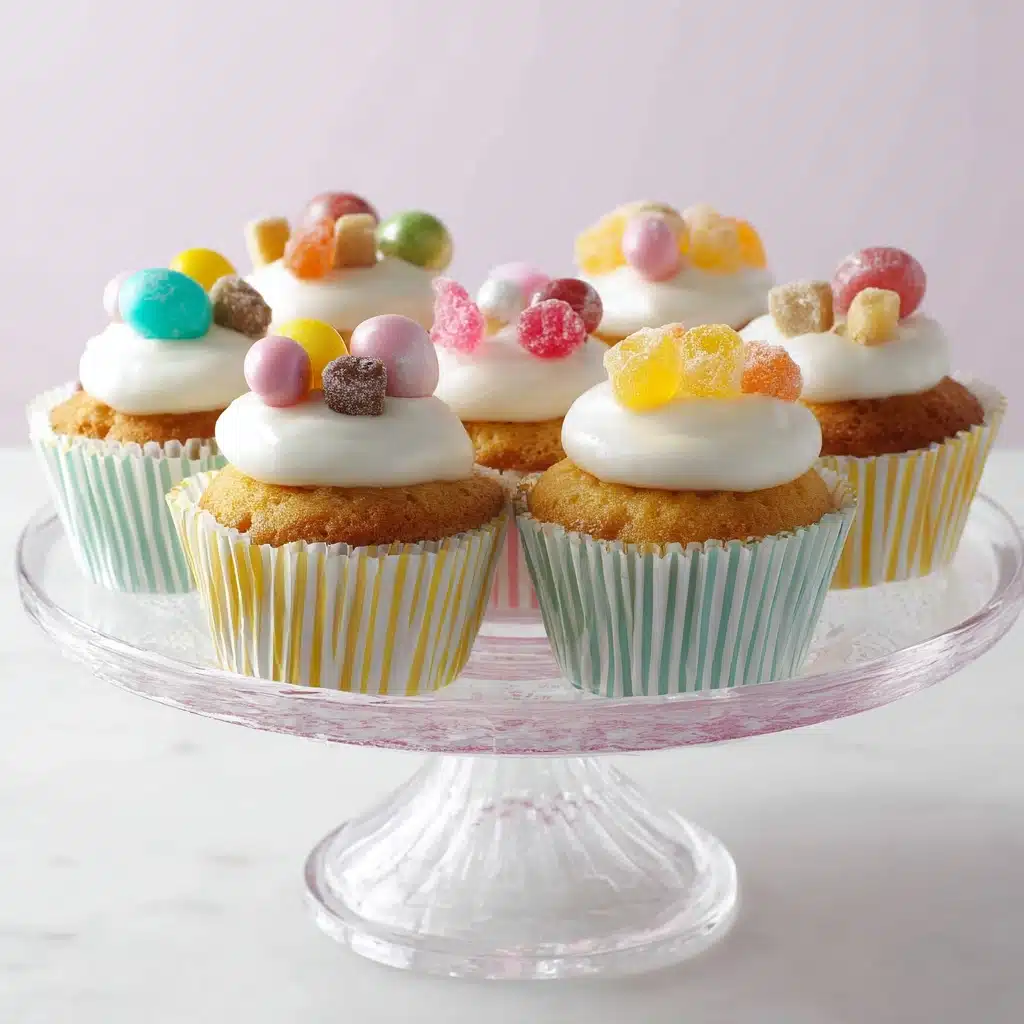
One of the true joys of Mary Berry’s iced fairy cakes recipe is personalizing each cake. Traditional sprinkles, pastel-colored candies, edible pearls, or tiny chocolate chips all work brilliantly. If you’re baking with little ones, let them go wild and create their own colorful combinations for a festive, homey touch.
Side Dishes
These fairy cakes are naturally front and center, but they’re wonderful alongside a pot of English breakfast tea, a frothy milky coffee, or even a glass of cold milk. For afternoon teas, serve them with mini sandwiches, fresh fruit, and a selection of light biscuits to complete the spread.
Creative Ways to Present
Why not display the fairy cakes on a tiered cake stand for special occasions, nestle them in pretty paper cases, or wrap each in cellophane with a ribbon as a sweet gift? For parties, arrange them in rainbows or letter shapes for maximum visual impact — Mary Berry’s iced fairy cakes recipe is as much a feast for the eyes as for the taste buds.
Make Ahead and Storage
Storing Leftovers
Store leftover fairy cakes in an airtight container at room temperature, where they’ll stay deliciously moist for up to three days. If your kitchen is particularly warm or humid, pop them in the fridge but bring to room temperature before serving for best flavor and texture.
Freezing
You can absolutely freeze Mary Berry’s iced fairy cakes recipe (preferably before icing them). Once cooled, arrange them in a single layer, freeze until solid, then store in a sealed freezer bag or container for up to three months. When you’re ready, thaw at room temperature before adding fresh icing and decorations.
Reheating
Fairy cakes are best enjoyed at room temperature. If you prefer a slight warmth, a 5–10 second zap in the microwave brings back that “just baked” softness, but be cautious as the icing can melt. For frozen cakes, allow them to thaw fully first, and add icing after they’re defrosted for the prettiest results.
FAQs
Can I make Mary Berry’s iced fairy cakes recipe without self-raising flour?
Yes, you can substitute with plain flour plus 1 1/2 teaspoons of baking powder per 100g of flour. It’s a handy swap if you don’t keep self-raising flour on hand!
How do I get really smooth, glossy icing?
Gradually add the warm water to your icing sugar and mix until any lumps are gone. Aim for a consistency that’s thick enough to stay on the cake but still spreadable. A whisk can help achieve that glassy finish featured in Mary Berry’s iced fairy cakes recipe.
Can I make these cakes gluten-free?
Absolutely! Use a gluten-free self-raising flour blend. Check your baking powder and decorations to be sure they’re gluten-free as well, for a worry-free treat.
What’s the difference between fairy cakes and cupcakes?
Fairy cakes, as in this recipe, are smaller, lighter, and typically topped with a simple icing, while cupcakes are larger, richer, and frequently piled high with swirls of buttercream. Both are wonderful, but Mary Berry’s iced fairy cakes recipe is a classic choice for a sweet little bite.
How far in advance can I make and decorate Mary Berry’s iced fairy cakes recipe?
You can bake and ice these cakes a day ahead. Store them in a tin or container, and decorate just before serving for the freshest look. For parties, prep the cakes in advance and let guests join in the decorating fun!
Final Thoughts
I can’t recommend Mary Berry’s iced fairy cakes recipe enough. There’s just something magical about a tray of these shimmering, pastel-topped cakes, perfect for special gatherings or simply making an ordinary day extra lovely. Give them a try — you’ll see smiles all round, no matter the occasion!
Print
Mary Berry’s iced fairy cakes recipe
- Total Time: 35 minutes
- Yield: 12 fairy cakes 1x
- Diet: Vegetarian
Description
A delightful recipe for Mary Berry’s iced fairy cakes, perfect for any occasion. These light and fluffy cakes with a sweet icing are sure to be a hit with both kids and adults.
Ingredients
Cake Ingredients:
- 100 g (4 oz) softened butter
- 100 g (4 oz) caster sugar
- 2 large eggs
- 100 g (4 oz) self-raising flour
- 1 level tsp baking powder
Icing Ingredients:
- Icing sugar
- Warm water
- Sweets for decoration
Instructions
- Preheat the oven: Preheat the oven to 200C fan/180C fan/gas 6. Place fairy cake cases into a 12-hole bun tin.
- Mix the ingredients: Beat softened butter, caster sugar, eggs, self-raising flour, and baking powder until smooth. Fill each case with the mixture.
- Bake the cakes: Bake for 15-20 minutes until well-risen and golden. Cool on a wire rack.
- Ice the cakes: Mix icing sugar and water to make a stiff icing. Spoon over the cakes, decorate with sweets, and let set before serving.
Notes
- For best results, make sure all ingredients are at room temperature.
- You can add food coloring to the icing for a more vibrant look.
- Experiment with different decorations like sprinkles or edible glitter.
- Prep Time: 15 minutes
- Cook Time: 15-20 minutes
- Category: Dessert
- Method: Baking
- Cuisine: British
Nutrition
- Serving Size: 1 fairy cake
- Calories: 180
- Sugar: 12g
- Sodium: 120mg
- Fat: 8g
- Saturated Fat: 5g
- Unsaturated Fat: 2g
- Trans Fat: 0g
- Carbohydrates: 24g
- Fiber: 0.5g
- Protein: 2g
- Cholesterol: 50mg
Keywords: Mary Berry, fairy cakes, iced, baking, dessert, British, easy
