
Healthy Homemade Butterfingers Recipe
Introduction
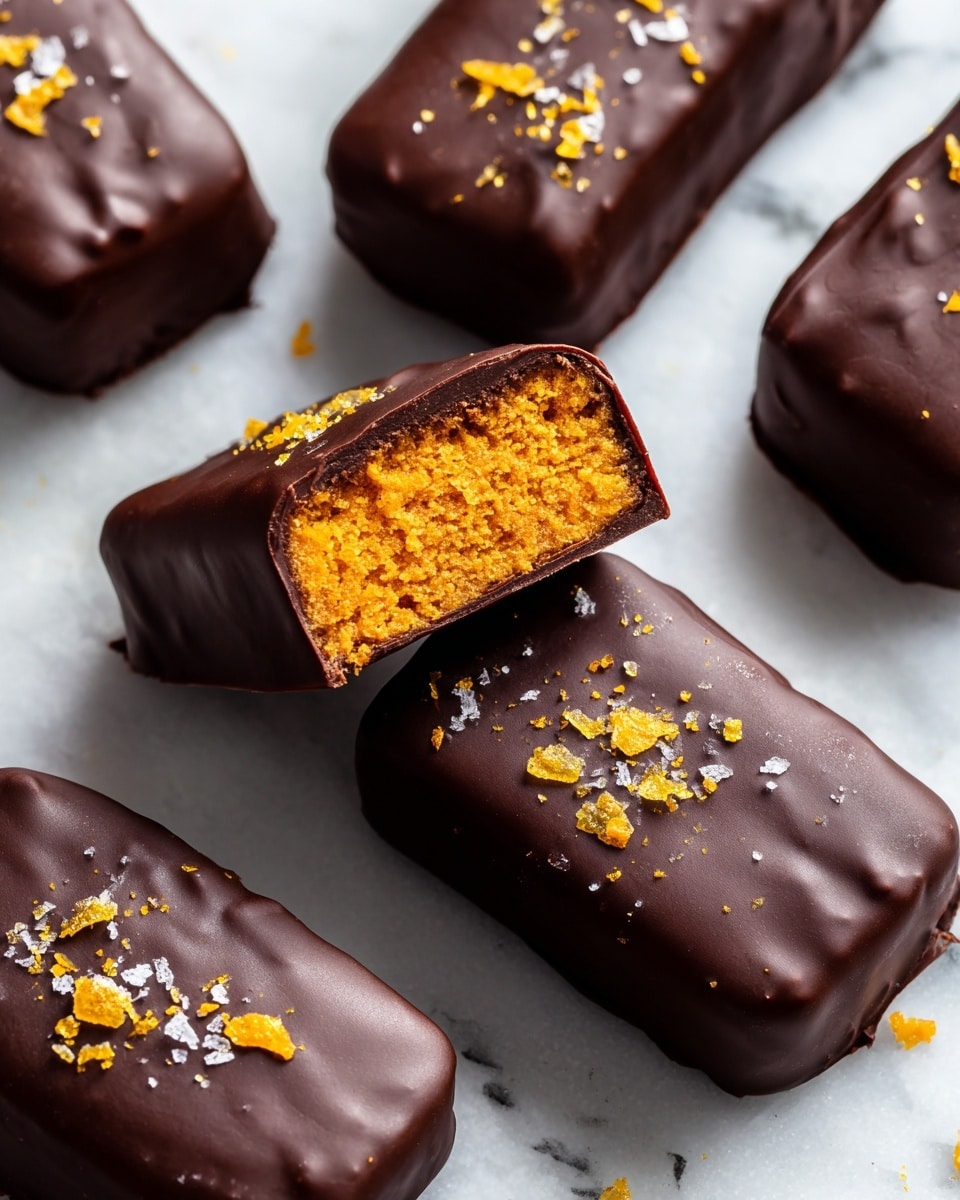
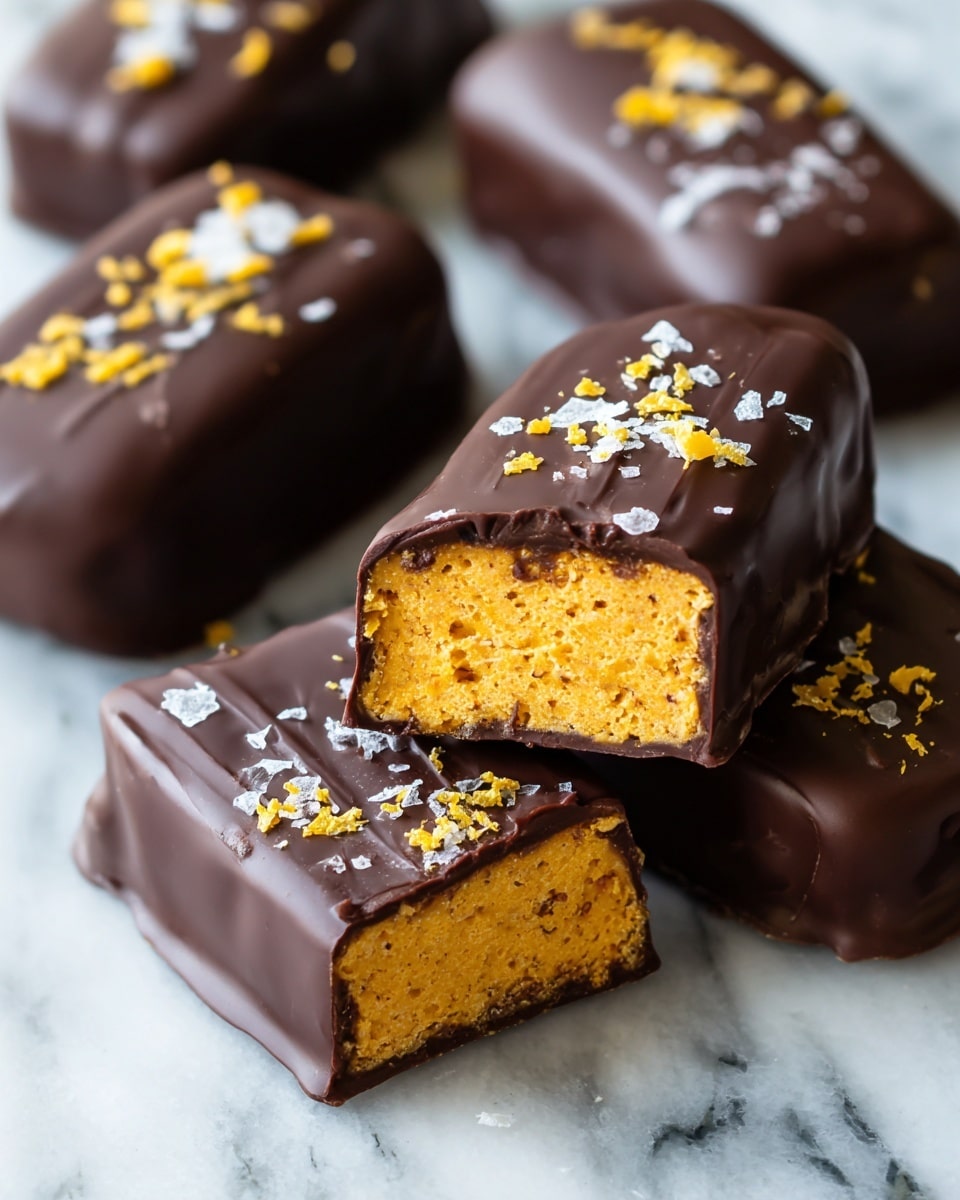
This healthy homemade butterfingers recipe uses just five simple ingredients to create a gluten-free, dairy-free, and naturally sweetened treat. If you love the classic candy bar but want a better-for-you option, these crunchy, chocolate-coated bars are perfect to satisfy your sweet tooth.
Ingredients
- 1 cup peanut butter
- 1/3 cup maple syrup or honey
- 2 cups corn flakes
- 1 cup chocolate chips
- 2 teaspoons coconut oil
Instructions
- Step 1: Add the corn flakes to a large zip-top bag, seal it, and crush the cereal into small pieces.
- Step 2: In a large bowl, mix the peanut butter and honey or maple syrup until well combined. Add the crushed corn flakes and stir until fully incorporated.
- Step 3: Line a 9×4-inch loaf pan with parchment paper. Transfer the mixture to the pan and press it down evenly. Place the pan in the freezer and let it harden for at least 1 hour.
- Step 4: Remove the pan from the freezer and carefully lift the hardened mixture out onto a cutting board. Cut it into 12 bars.
- Step 5: In a small bowl, melt the chocolate chips and coconut oil together, stirring until smooth. Dip each bar into the melted chocolate to coat completely, then place on a parchment-lined plate.
- Step 6: Return the coated bars to the freezer for about 10 minutes, or until the chocolate sets. Enjoy immediately or store as directed below.
Tips & Variations
- For a vegan version, use maple syrup instead of honey and dairy-free chocolate chips.
- To make a low-carb treat, choose sugar-free chocolate and a low-carb cereal alternative.
- For a nut-free option, substitute peanut butter with sunflower seed butter.
- Use gluten-free corn flakes to keep the recipe gluten-free.
Storage
Store the homemade butterfingers in an airtight container in the freezer for up to 3 months. When ready to enjoy, allow them to thaw for a few minutes at room temperature or eat straight from the freezer for a firm, crunchy snack.
How to Serve
Serve this delicious recipe with your favorite sides.
FAQs
Can I use a different nut butter?
Yes, you can substitute peanut butter with almond butter or sunflower seed butter, especially for nut-free versions. Just ensure the texture is creamy to help hold the bars together.
Do I have to use coconut oil?
Coconut oil helps melt the chocolate smoothly and adds a subtle flavor, but you can substitute it with a neutral oil like vegetable oil if preferred.
Print
Healthy Homemade Butterfingers Recipe
- Total Time: 1 hour 5 minutes
- Yield: 12 servings 1x
- Diet: Gluten Free
Description
This healthy homemade butterfingers recipe features a delicious and satisfying treat made with just 5 simple ingredients. These gluten-free, dairy-free bars use natural sweeteners like honey or maple syrup and replicate the classic candy bar crunch with corn flakes. Coated in dark chocolate and coconut oil, they offer a guilt-free, crunchy, chocolate-covered snack perfect for a quick dessert or treat, especially when stored in the freezer.
Ingredients
Main Ingredients
- 1 cup peanut butter (natural, no added sugar)
- 1/3 cup maple syrup or honey
- 2 cups gluten-free corn flakes
- 1 cup dark chocolate chips
- 2 teaspoons coconut oil (e.g., Nutiva Organic Coconut Oil)
Instructions
- Crush the Corn Flakes: Place the corn flakes into a large zip-top bag, seal it tightly, and crush the cereal into small pieces using your hands or a rolling pin to create the crunchy base.
- Mix Peanut Butter and Sweetener: In a large bowl, combine the peanut butter with the honey or maple syrup, stirring well until smooth and evenly blended.
- Combine and Press Mixture: Add the crushed corn flakes to the peanut butter mixture and mix thoroughly to ensure all flakes are coated. Transfer this mixture into a 9×4-inch loaf pan lined with parchment paper and press firmly to create an even layer.
- Freeze to Set: Place the loaf pan in the freezer for at least 1 hour to allow the mixture to harden and set properly for easy slicing.
- Cut into Bars: Remove the frozen mixture from the pan onto a cutting board and carefully slice it into 12 evenly sized bars.
- Melt Chocolate Coating: In a small bowl, melt the chocolate chips with the coconut oil, either in a microwave in short bursts or over a double boiler, whisking until smooth and fully combined.
- Dip Bars in Chocolate: One by one, dip each bar into the melted chocolate to thoroughly coat all sides. Lift them out and place each coated bar on a parchment-lined plate to set.
- Final Freeze: Transfer the chocolate-coated butterfinger bars back to the freezer for about 10 minutes or until the chocolate hardens completely.
- Store and Enjoy: Enjoy the bars immediately or keep them stored in an airtight container in the freezer for up to 3 months to maintain freshness and crunch.
Notes
- Make it Vegan by swapping honey for maple syrup and using dairy-free chocolate chips.
- For a low-carb version, use sugar-free chocolate and a low-carb cereal alternative.
- To make nut-free, substitute peanut butter with sunflower seed butter.
- Store bars in an airtight container in the freezer for up to 3 months.
- Use gluten-free corn flakes to keep the recipe gluten-free.
- Prep Time: 5 minutes
- Cook Time: 0 minutes
- Category: Dessert
- Method: Freezing
- Cuisine: American
Keywords: healthy butterfingers, gluten-free candy, dairy-free dessert, natural sweetener snack, homemade chocolate bars, peanut butter candy, healthier butterfingers
