
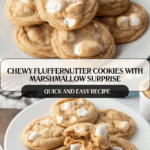
Fluffernutter Cookies Recipe
Introduction
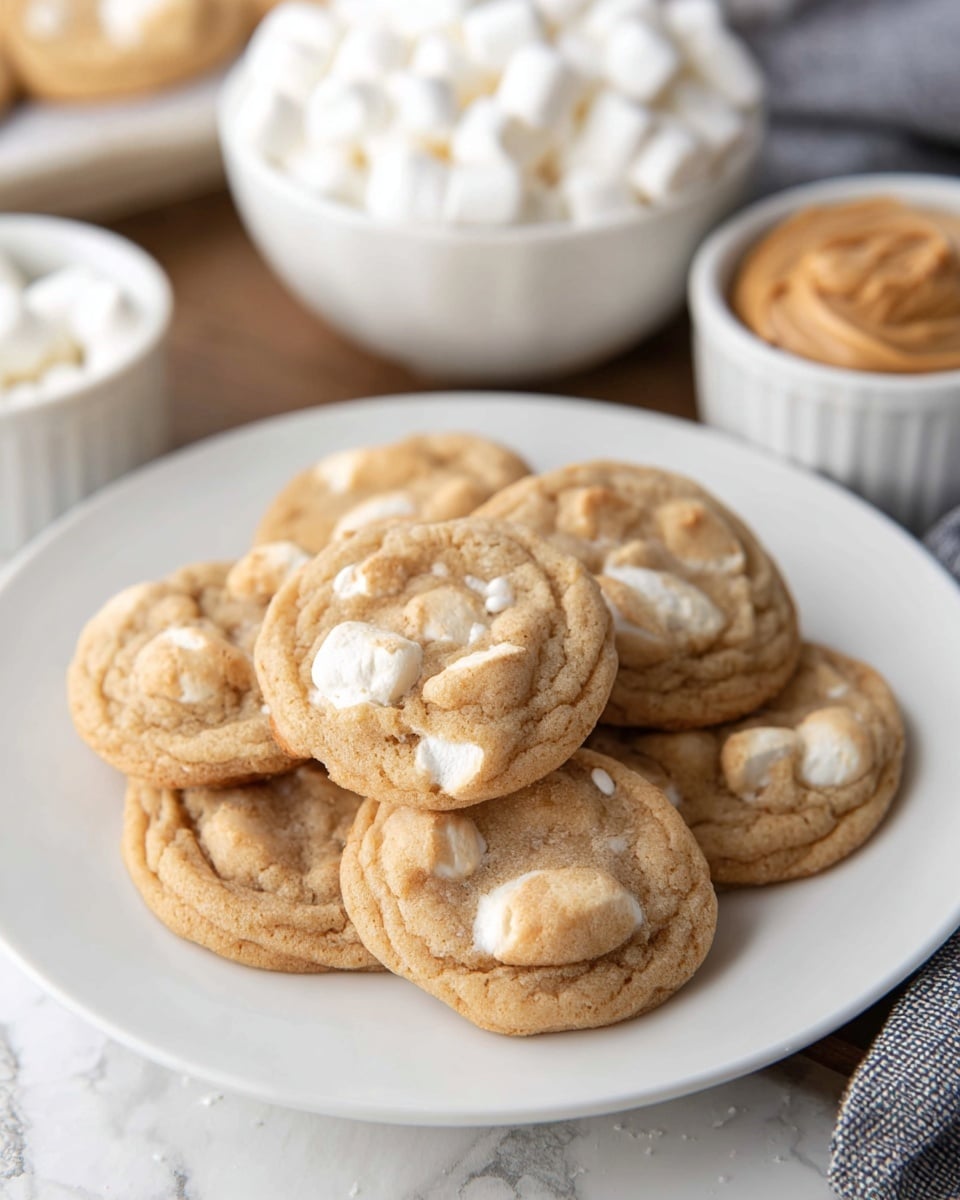
Fluffernutter Cookies combine the classic flavors of peanut butter and marshmallow into a soft, chewy treat that’s perfect for any occasion. These cookies are delightfully sweet with a gooey surprise inside, making them an irresistible snack for peanut butter lovers.
Ingredients
- 1 ½ cups all-purpose flour (stir, spoon & level)
- 1 tsp baking soda
- ½ tsp salt
- ½ cup unsalted butter (room temperature)
- ½ cup granulated sugar
- ½ cup light brown sugar (gently packed)
- ½ cup creamy peanut butter
- 1 large egg
- 1 tsp vanilla extract
- 1 cup mini marshmallows (frozen*)
Instructions
- Step 1: Freeze the mini marshmallows for at least 1-2 hours before using and keep them frozen until ready to bake.
- Step 2: Preheat oven to 350 degrees Fahrenheit. Line cookie sheets with a silicone baking mat or parchment paper and set aside.
- Step 3: In a medium bowl, stir together the flour, baking soda, and salt. Set aside.
- Step 4: Using an electric mixer, cream the butter, granulated sugar, and brown sugar until light and creamy.
- Step 5: Add the peanut butter, egg, and vanilla extract to the creamed mixture. Mix well and scrape down the sides of the bowl. Gradually add the dry ingredients and mix until almost incorporated.
- Step 6: Remove the marshmallows from the freezer and fold a heaping cup of them into the cookie dough.
- Step 7: Use a #30 scoop (about 2 tablespoons) to shape the cookie dough into balls quickly. Place them a few inches apart on the prepared baking sheet. Return any remaining dough to the fridge to keep marshmallows cold until baking.
- Step 8: Bake the cookies at 350˚F for 11-12 minutes or until just set and edges start to brown. Let the cookies cool completely on the baking tray, about 10 minutes. After 2-3 minutes of cooling, use a greased spatula to gently round any misshapen cookies if desired. Transfer cooled cookies to a serving platter or airtight container. Note: cookies may stick to a wire rack.
Tips & Variations
- Freezing the marshmallows prevents them from melting too quickly and helps maintain their gooey texture inside the cookie.
- For a crunchier texture, add chopped peanuts or peanut butter chips to the dough.
- Use natural peanut butter for a more intense peanut flavor, but expect a slightly different texture.
Storage
Store Fluffernutter Cookies in an airtight container at room temperature for up to 3 days. For longer storage, freeze them for up to 2 months. To reheat, warm gently in the microwave for 10-15 seconds to restore softness.
How to Serve
Serve this delicious recipe with your favorite sides.
FAQs
Can I use regular marshmallows instead of mini?
Yes, but mini marshmallows work best for even melting and distribution. Chop regular marshmallows into small pieces and freeze before mixing into the dough to achieve a similar effect.
Why do the cookies stick to the wire cooling rack?
Because of the melted marshmallows inside, these cookies can be sticky once baked. It’s best to cool them completely on the baking sheet and transfer them carefully to avoid damage or sticking.
Print
Fluffernutter Cookies Recipe
- Total Time: 1 hour 27 minutes
- Yield: About 24 cookies 1x
Description
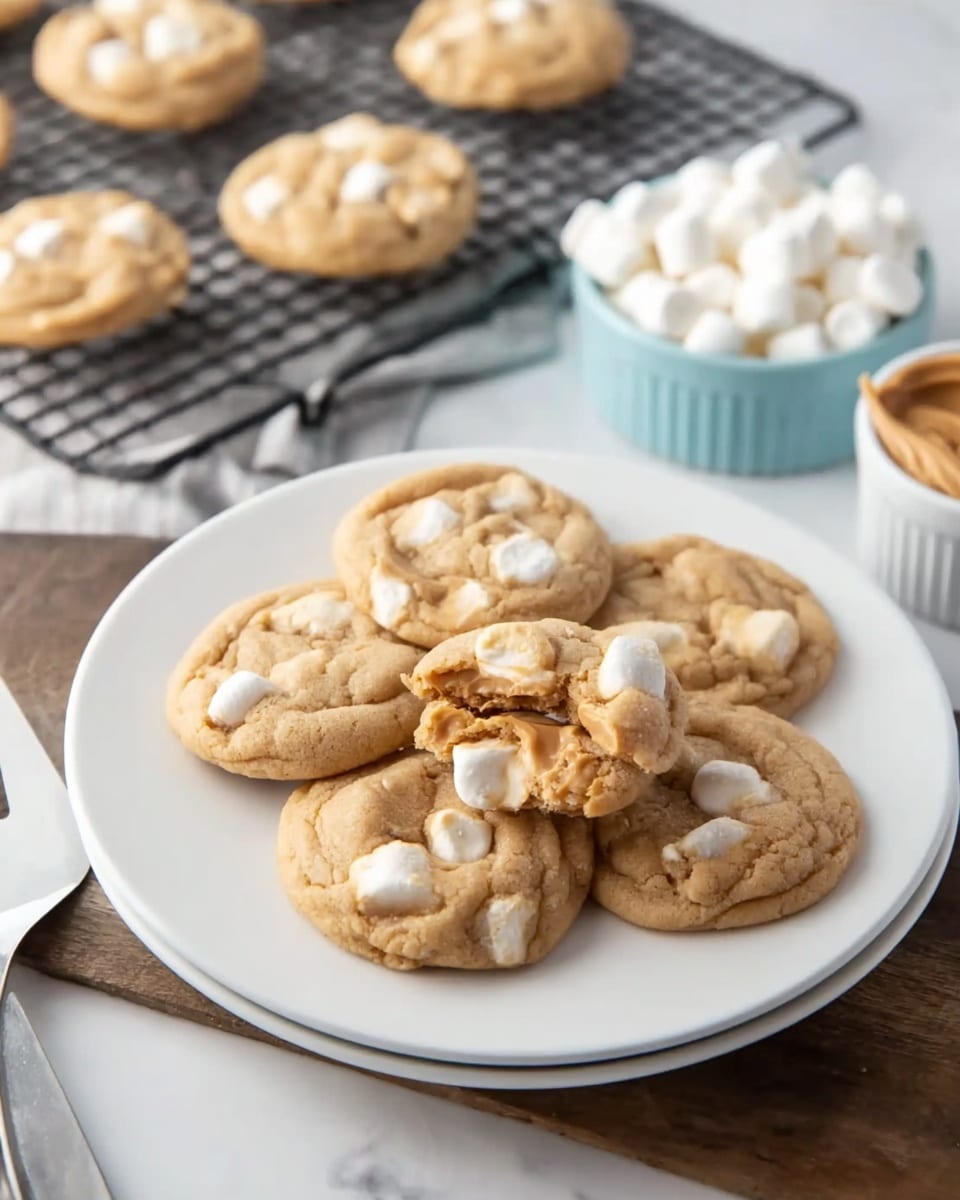
Fluffernutter Cookies are a delightful twist on classic peanut butter cookies, featuring creamy peanut butter and gooey mini marshmallows folded into a soft, chewy dough. These cookies bake to golden perfection with slightly crisp edges and a fluffy, marshmallow-studded center, perfect for a sweet treat that combines nostalgia with a fun texture.
Ingredients
Dry Ingredients
- 1 ½ cups all-purpose flour (stir, spoon & level)
- 1 tsp baking soda
- ½ tsp salt
Wet Ingredients
- ½ cup unsalted butter (room temperature)
- ½ cup granulated sugar
- ½ cup light brown sugar (gently packed)
- ½ cup creamy peanut butter
- 1 large egg
- 1 tsp vanilla extract
Add-ins
- 1 cup mini marshmallows (frozen*)
Instructions
- Freeze Marshmallows: Freeze the mini marshmallows for at least 1-2 hours before baking and keep them in the freezer until you are ready to mix and bake. This helps prevent them from melting too quickly in the dough.
- Preheat Oven and Prepare Baking Sheets: Set your oven to 350 degrees Fahrenheit (177 degrees Celsius). Line cookie sheets with silicone baking mats or parchment paper to prevent sticking and provide an even bake.
- Mix Dry Ingredients: In a medium bowl, combine the all-purpose flour, baking soda, and salt. Stir to evenly distribute the leavening and salt, then set aside.
- Cream Butter and Sugars: Using an electric mixer, beat the unsalted butter, granulated sugar, and light brown sugar together until the mixture is light in color and fluffy. This process aerates the dough for a tender texture.
- Add Wet Ingredients: Beat in the creamy peanut butter, egg, and vanilla extract until well combined, stopping occasionally to scrape down the bowl for even mixing.
- Combine Dry and Wet Mixtures: Gradually add the dry flour mixture to the wet ingredients. Mix until the flour is almost fully incorporated to avoid overmixing which can toughen the cookies.
- Fold in Marshmallows: Remove the frozen marshmallows from the freezer and gently fold a heaping cup of them into the cookie dough, distributing them carefully without melting.
- Scoop Dough: Using a #30 scoop (approximately 2 tablespoons), quickly form dough balls and place them several inches apart on the prepared baking sheets. Chill any remaining dough to keep marshmallows cold.
- Bake Cookies: Bake the cookies at 350°F for 11-12 minutes or until they are just set and the edges begin to brown slightly. This ensures a chewy center with crispy edges.
- Cool and Shape: Allow cookies to cool on the baking tray for about 10 minutes. After 2-3 minutes, use a greased spatula to gently round out any misshapen cookies if desired. Transfer the cooled cookies directly to a platter or airtight container; avoid using a wire rack as marshmallows may stick.
Notes
- Freezing marshmallows before folding into dough is crucial to maintain their shape and prevent melting.
- Use a silicone baking mat or parchment paper to prevent sticking and help cookies bake evenly.
- Chilling extra dough helps keep marshmallows cold and easier to handle.
- Cookies may stick to wire racks due to marshmallow; cooling on the tray is recommended.
- Adjust baking time slightly if you prefer softer or crisper cookies.
- Prep Time: 15 minutes
- Cook Time: 12 minutes
- Category: Dessert
- Method: Baking
- Cuisine: American
Keywords: Fluffernutter Cookies, peanut butter cookies, marshmallow cookies, soft chewy cookies, easy cookie recipe, nostalgic cookies
