
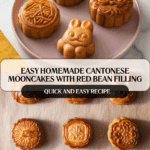
Cantonese-Style Mooncake Recipe (廣式月餅) Recipe
If you’ve ever wanted to recreate a true celebration treat that perfectly balances tender, flaky pastry and sweet, rich filling, then this Cantonese-Style Mooncake Recipe (廣式月餅) is your golden ticket. These mooncakes boast a silky, thin skin wrapped around luscious red bean paste, capturing the essence of traditional Mid-Autumn Festival delights. Each bite delivers a comforting sweetness paired with an almost buttery delicacy to the dough—making them a treasured favorite that you’ll be thrilled to bake and share.
Ingredients You’ll Need
This recipe calls for simple, well-chosen ingredients that come together to create such an iconic flavor and texture. Each component plays a vital role, from the glossy golden syrup giving that beautiful sheen and moisture, to the special kansui that lends the dough its tender bounce.
- Golden syrup (1/2 cup/140g): Provides sweetness and moisture, helping create a glossy mooncake skin that’s soft and pliable.
- Neutral-flavored oil (scant 1/3 cup/60g): Safflower, vegetable, or canola oil keeps the dough tender without overpowering the delicate flavors.
- Kansui (3/4 teaspoon): A traditional alkaline water essential for that perfect mooncake dough texture and subtle flavor enhancement.
- All-purpose flour (1 3/4 cups/210g, plus more for dusting): The foundation of the dough, carefully balanced to achieve elasticity and softness.
- Red bean paste (1 to 1 1/4 cups): This silky, sweet filling is the heart of the mooncake, offering that signature earthy sweetness.
- Large egg (1): For the glossy egg wash that creates that beautiful golden brown finish.
- Water (1 1/2 tablespoons): Mixed with egg to make the perfect, light wash for baking.
How to Make Cantonese-Style Mooncake Recipe (廣式月餅)
Step 1: Preparing the Mooncake Skin
Start by whisking together the golden syrup, neutral oil, and kansui in a medium bowl. Then, fold in all the flour at once using a wooden spoon until it’s mostly absorbed. Switch to a flexible spatula to scrape down the sides and knead the dough gently until smooth. The dough should feel slightly tacky but never sticky. Cover it with a damp cloth and let it rest comfortably for 45 minutes to an hour—this resting phase is critical to develop the perfect texture.
Step 2: Dividing the Red Bean Paste
While the dough rests, prepare the filling. Measure out 16 equal portions of red bean paste, about 25 grams each. Roll each portion into a smooth ball and line them up ready for assembly. Having the filling uniform ensures every mooncake bakes evenly and tastes consistent.
Step 3: Shaping the Mooncakes
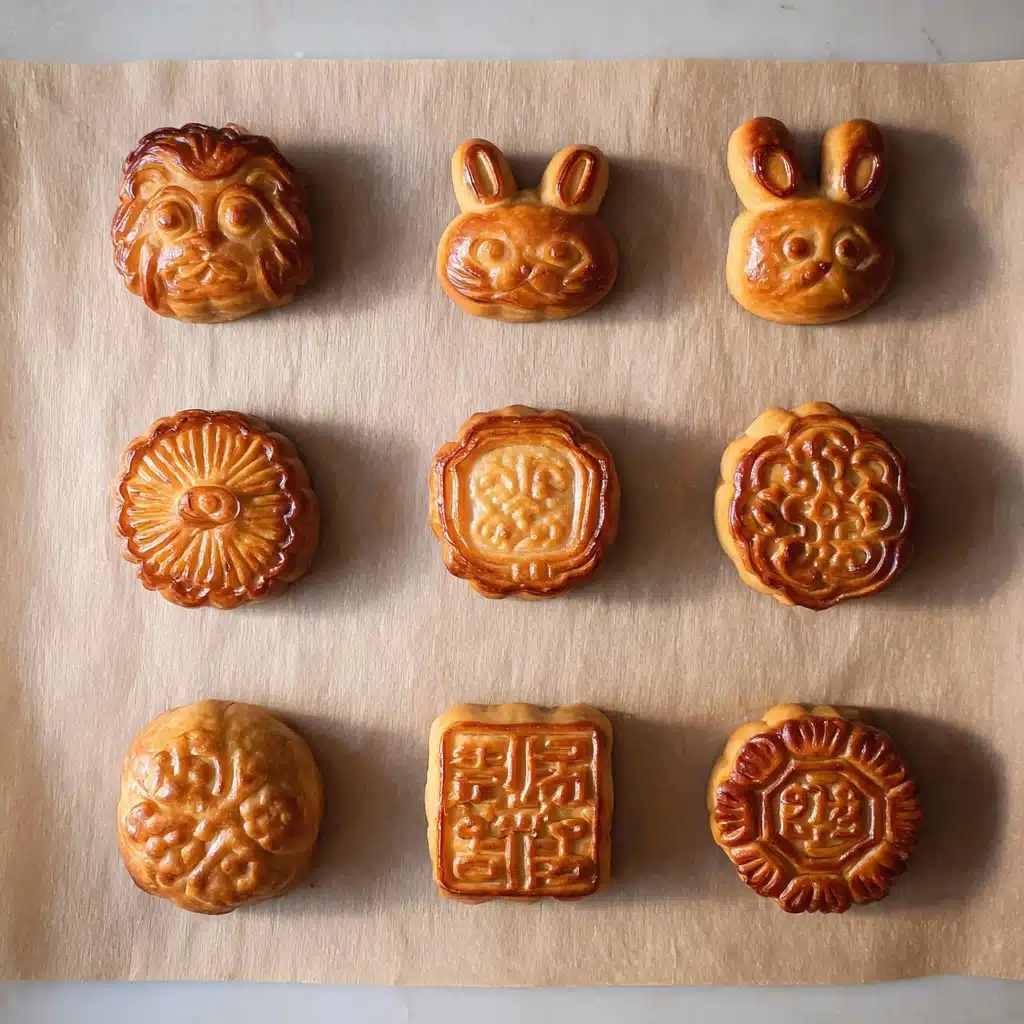
Preheat your oven to 350ºF (175ºC) and line two baking sheets with parchment paper. Lightly oil a large plate for rolling the dough balls. Divide the rested dough into 16 pieces around 25 to 26 grams each, then roll them into balls. Since the dough is slightly sticky, roll each ball between two sheets of plastic wrap or parchment paper to get a neat circle about 3 1/4 to 3 1/2 inches wide.
Remove the top plastic layer, place a red bean ball in the center, then drape the dough over it. Peel away the bottom plastic and use your hands to wrap the filling tightly without air pockets. Roll the sealed ball smooth, then lightly dust with flour and shape it into a short oblong log. This makes it easier to press into your mooncake mold.
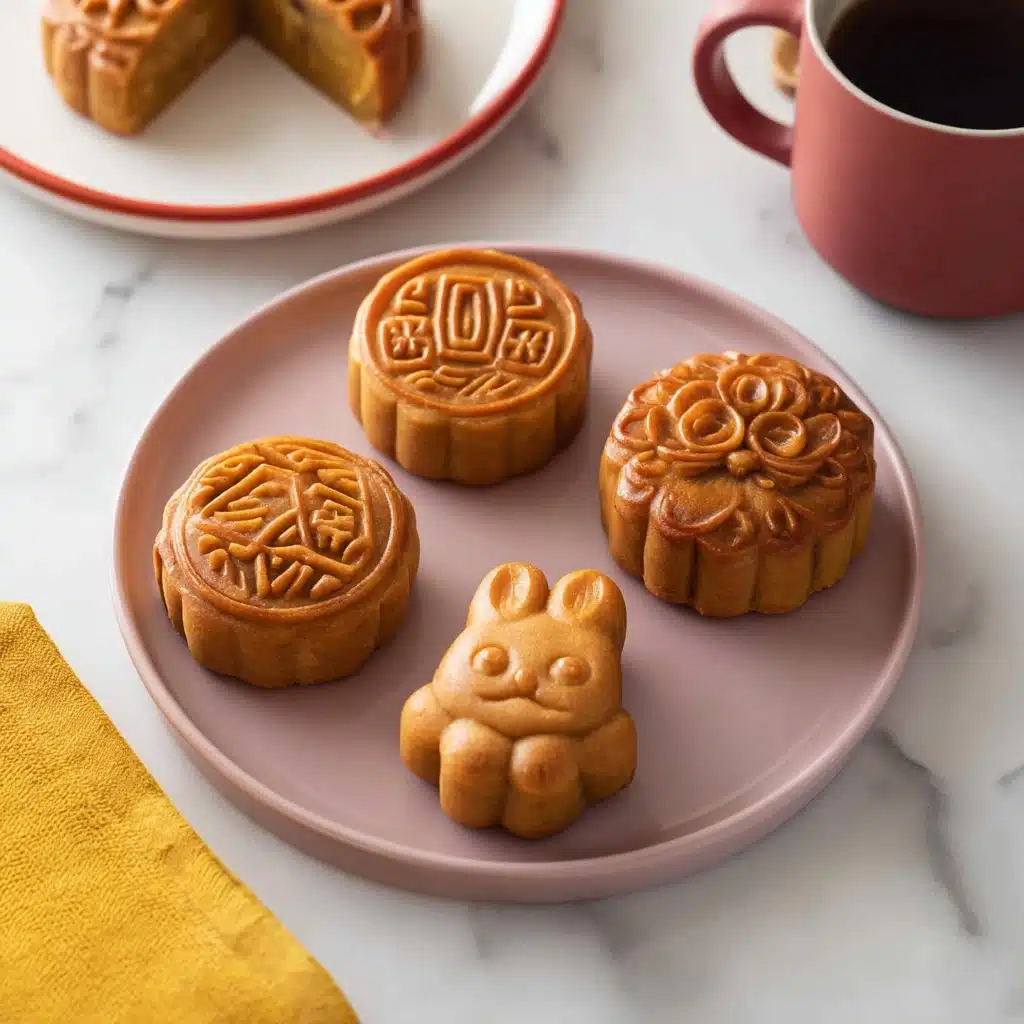
Press the log gently into the mold, flipping the mold onto a floured surface, and firmly press the handle down to imprint the design without squeezing out dough. Transfer the shaped mooncake to the baking sheet and repeat until you have 8 mooncakes.
Step 4: Baking the Mooncakes
Slide the baking sheet into the oven and bake for 10 minutes. Meanwhile, whisk together one egg and water to make your egg wash. After the initial bake, brush the top of each mooncake with a very thin layer of egg wash using two brushes if you have them—one to apply and one to remove excess—to preserve the intricate patterns.
Return the mooncakes to the oven and bake for another 8 to 10 minutes until they’re a gorgeous golden brown. Let them cool for 5 minutes before transferring to a cooling rack. Continue shaping and baking the second batch the same way.
Step 5: The Crucial Wait
Resisting temptation to eat right away is part of the mooncake magic. Fresh out of the oven, mooncakes are firm and may have cracks. Give them 2 days to rest—this softens the skin, reduces cracks, and allows a shiny, inviting gloss to develop. Patience truly transforms the texture and appearance.
How to Serve Cantonese-Style Mooncake Recipe (廣式月餅)
Garnishes
Cantonese mooncakes traditionally don’t require elaborate garnishes. However, a light dusting of edible gold dust or a sprinkle of toasted sesame seeds on top before baking can lend a festive shimmer. Alternatively, serve with a small side of fresh chrysanthemum petals for an aromatic touch that complements traditional tea pairings beautifully.
Side Dishes
These mooncakes come alive when paired with fragrant Chinese teas such as jasmine, pu-erh, or oolong. The slight bitterness of tea cuts through the sweetness, creating a harmonious balance. For a fuller spread, consider light dim sum dishes like steamed dumplings or scallion pancakes, enhancing the festive experience without overpowering the mooncake’s subtle flavors.
Creative Ways to Present
Presentation is part of the fun with Cantonese-Style Mooncake Recipe (廣式月餅). Arrange mooncakes on an elegant wooden serving tray lined with banana leaves or decorative paper. Stack smaller mooncakes in tiers for a celebratory centerpiece. Personal touches like carved wooden mooncake molds or delicate red ribbons tied around individual pastries make gifting these mooncakes thoughtful and charming.
Make Ahead and Storage
Storing Leftovers
Stored in an airtight container at room temperature, your mooncakes will stay fresh for up to 4 days. They maintain their delicate texture and rich flavors best when kept away from excessive humidity or heat. This makes them perfect for enjoying gradually over the course of several days, or sharing with friends across the week.
Freezing
If you want to keep your mooncakes longer, freezing is a great option. Wrap each mooncake tightly in plastic wrap and place in a freezer-safe container or bag. Mooncakes can last several months frozen without losing quality. When ready to enjoy, thaw them overnight in the fridge to preserve their texture and flavor.
Reheating
To revive the soft, fresh-from-the-oven sensation, allow frozen or refrigerated mooncakes to reach room temperature before serving. If you prefer, a gentle steamed warm-up for 5 to 7 minutes works well. Avoid microwaving directly as it may toughen the pastry or dry the filling.
FAQs
What is kansui and can I substitute it?
Kansui is alkaline water traditionally used in Chinese baking to give mooncake dough its characteristic texture and color. If you can’t find kansui, a tiny pinch of baking soda dissolved in water can sometimes work as a substitute, but the texture and flavor may vary slightly.
Can I use other fillings besides red bean paste?
Absolutely! Lotus seed paste, mung bean paste, or even salted egg yolks are popular alternatives in Cantonese mooncakes. Feel free to experiment with your favorite sweet or savory fillings for a personal twist on this classic recipe.
Why should I wait 2 days before eating the mooncakes?
The resting period allows moisture to redistribute into the pastry, softening the skin and reducing any cracks. This time transforms the mooncakes from firm and dry to tender and glossy, which is the hallmark of traditional Cantonese mooncakes.
Can I make these mooncakes vegan?
The dough and filling can be made vegan by ensuring your red bean paste contains no animal products and by replacing the egg wash with a plant-based milk or syrup glaze for shine.
How do I prevent the mooncake skin from cracking?
The key is proper dough hydration and gentle handling. Resting your dough allows the flour to fully absorb the moisture, preventing cracks. Also, make sure not to roll the dough too thin or work it too aggressively when wrapping the filling.
Final Thoughts
There’s something truly special about making and sharing a batch of Cantonese-Style Mooncake Recipe (廣式月餅). It’s a joyous process that connects tradition with your own kitchen creativity, resulting in mooncakes that are both beautiful and delicious. Whether you’re celebrating the Mid-Autumn Festival or simply craving a soulful treat, take the time to enjoy the steps and the delightful payoff—your friends and family will certainly be asking for seconds.
Print
Cantonese-Style Mooncake Recipe (廣式月餅) Recipe
- Total Time: 3 days (including resting time)
- Yield: 16 mooncakes 1x
- Diet: Vegetarian
Description
This Cantonese-Style Mooncake recipe delivers traditional, tender mooncakes with a luscious red bean paste filling. Made with golden syrup and kansui in the dough, these mooncakes have a beautiful glossy finish once baked and require patience to achieve the perfect soft texture. Ideal for celebrating the Mid-Autumn Festival, they come with detailed steps for dough preparation, wrapping, molding, and baking to achieve authentic flavor and appearance.
Ingredients
Mooncake Skin
- 1/2 cup (140g) golden syrup
- Scant 1/3 cup (60g) safflower, vegetable, or canola oil (any neutral-flavored oil works)
- 3/4 teaspoon kansui
- 1 3/4 cups (210g) all-purpose flour, plus more for dusting
Filling
- 1 to 1 1/4 cups red bean paste
Egg Wash
- 1 large egg
- 1 1/2 tablespoons water
Instructions
- Make Mooncake Skin: In a medium mixing bowl, whisk together the golden syrup, oil, and kansui. Add all-purpose flour all at once and mix with a wooden spoon until nearly fully absorbed.
- Form Dough: Use a silicone spatula to fold in any remaining dry flour from bowl sides into the dough until smooth and tacky but not sticky. Cover with a damp towel or silicone lid and rest for 45 minutes to 1 hour.
- Divide Bean Paste: Portion 16 balls of red bean paste, each weighing 25 grams (about a scant 1 1/2 tablespoons). Roll into smooth balls and place on a plate.
- Preheat Oven: Set oven to 350ºF (175ºC) and line two large baking sheets with parchment paper.
- Divide Dough: Grease a large plate, divide dough into 16 pieces (25-26 grams each), and roll into balls. Keep balls lightly separated on the plate.
- Roll Dough: Place each dough ball between two sheets of plastic or parchment paper; flatten with hand then roll into a 3 1/4 to 3 1/2 inch circle, rolling thinner at the edges.
- Wrap Filling: Remove top sheet, drape dough circle over a bean paste ball, remove second sheet, flip dough with filling into your hand, and carefully wrap the dough around filling. Pinch to seal and roll gently into smooth balls.
- Prepare for Molding: Lightly dust work surface and roll each wrapped mooncake ball in flour, shaping into short oblong logs for easier molding.
- Shape Mooncakes: Insert each log into a mooncake mold and press gently with thumbs. Flip mold onto a floured surface and press handle down with medium pressure to release shaped mooncake onto prepared sheets. Repeat for 8 mooncakes per batch.
- Bake First Batch: Bake mooncakes for 10 minutes at 350ºF (175ºC).
- Prepare Egg Wash: Whisk egg and water together to make egg wash while first batch bakes.
- Apply Egg Wash: Remove mooncakes from oven, apply a thin layer of egg wash using two brushes to prevent filling mold indentations. Return mooncakes to oven.
- Bake Again: Bake for another 8 to 10 minutes until tops are evenly golden brown.
- Cool and Repeat: Let baked mooncakes cool on a rack for 5 minutes. Shape and bake the second batch using the same process.
- Rest Mooncakes: Allow mooncakes to rest 2 full days (preferably 3) at room temperature for moisture redistribution, softening the skin and enhancing gloss and texture.
- Store: Store baked mooncakes in an airtight container for up to 4 days, refrigerate for 8-9 days, or freeze for several months. Bring to room temperature before serving.
Notes
- Golden syrup adds sweetness and chewiness to mooncake skin. You can find it in Asian or specialty stores.
- Kansui is an alkaline solution used in traditional mooncake dough; it contributes to the unique texture and color. Available in Asian markets or online.
- Using plastic sheets to roll the dough prevents sticking and eases handling.
- Egg wash should be applied very thinly to preserve the mooncake mold design detail.
- Freshly baked mooncakes are hard and cracked; the texture improves significantly after resting.
- You can vary fillings such as lotus seed paste, mung bean paste, or salted egg yolks, adjusting dough rolling size accordingly.
- Store mooncakes properly to maintain freshness and softness.
- Prep Time: 20 minutes
- Cook Time: 20 minutes
- Category: Dessert
- Method: Baking
- Cuisine: Cantonese
Nutrition
- Serving Size: 1 mooncake (approximately 50g)
- Calories: 190 kcal
- Sugar: 12 g
- Sodium: 65 mg
- Fat: 7 g
- Saturated Fat: 1 g
- Unsaturated Fat: 6 g
- Trans Fat: 0 g
- Carbohydrates: 28 g
- Fiber: 2 g
- Protein: 3 g
- Cholesterol: 35 mg
Keywords: Cantonese mooncake, mooncake recipe, red bean mooncake, Mid-Autumn Festival, traditional mooncake, Chinese dessert
