
Blackberry Velvet Cake Recipe
Introduction
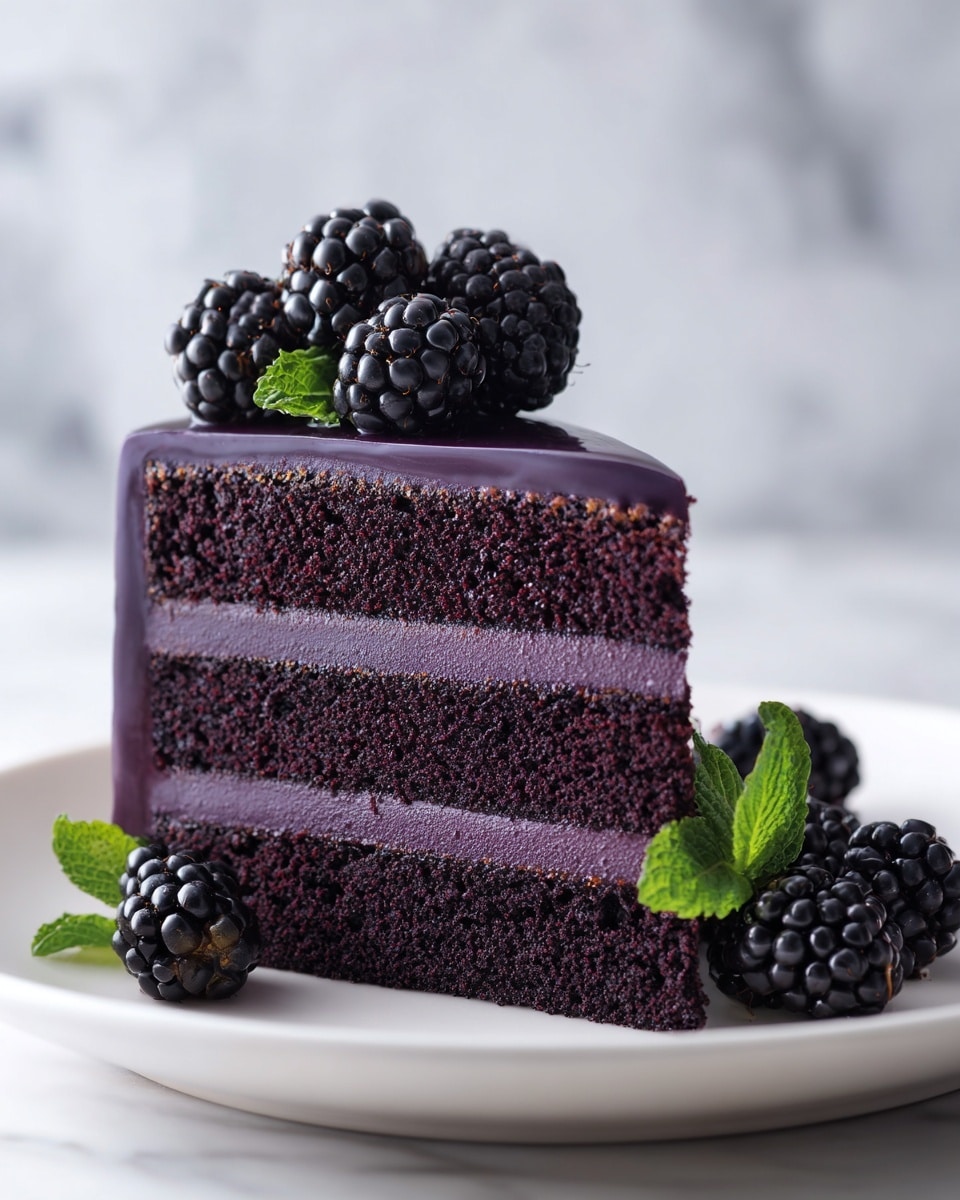
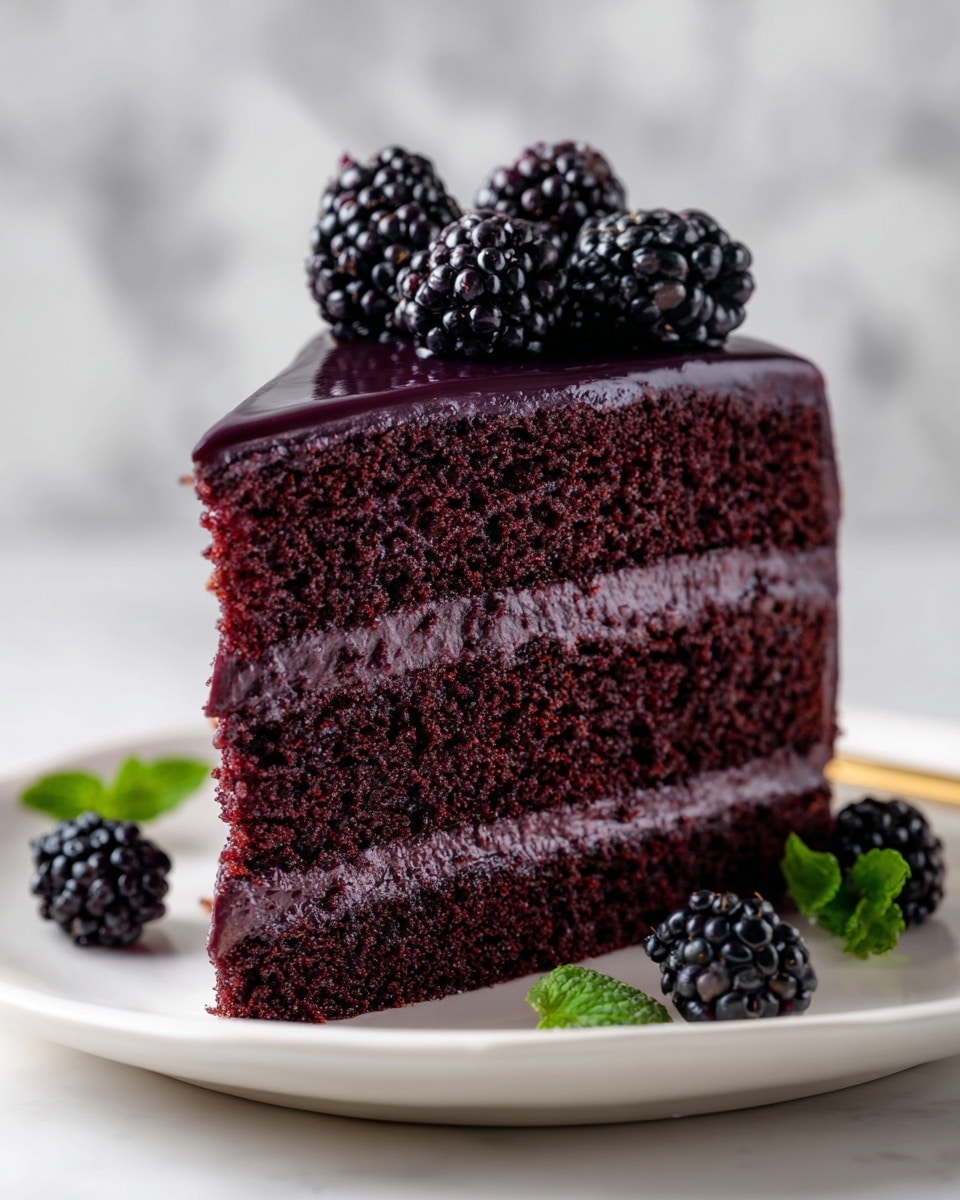
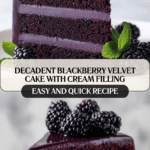
The Decadent Blackberry Velvet Gothic Cake with Lush Cream Filling is a rich, elegant dessert featuring a deep berry color, soft velvet crumb, and smooth cream center. Made with real blackberry flavor and subtle cocoa notes, this cake balances sweetness and tang perfectly. It’s a striking treat that’s both special and achievable in your home kitchen.
Ingredients
- For the Blackberry Velvet Cake Layers:
- 2½ cups (310 g) all-purpose flour
- 1½ cups (300 g) granulated sugar
- 2 tbsp unsweetened cocoa powder
- 1 tsp baking soda
- ½ tsp salt
- 1 cup (240 ml) neutral oil
- 1 cup (240 ml) buttermilk (or milk + 1 tbsp lemon juice)
- 2 large eggs, room temperature
- 1 cup (240 ml) blackberry purée, strained
- 1 tsp vanilla extract
- For the Lush Cream Filling:
- 8 oz (225 g) cream cheese, softened
- 1 cup (240 ml) heavy whipping cream, cold
- ½ cup (60 g) powdered sugar
- 1 tsp vanilla extract
Instructions
- Step 1: Preheat your oven to 350°F (175°C). Grease and line two 8-inch round cake pans with parchment paper.
- Step 2: In a large bowl, whisk together the flour, sugar, cocoa powder, baking soda, and salt until well combined.
- Step 3: In another bowl, whisk together the oil, buttermilk, eggs, blackberry purée, and vanilla extract until smooth.
- Step 4: Add the wet ingredients to the dry and gently mix until just combined. Avoid overmixing to keep the cake light.
- Step 5: Divide the batter evenly between the prepared pans. Bake for 28–32 minutes, or until a toothpick inserted in the center comes out clean. Allow the cakes to cool completely.
- Step 6: For the cream filling, beat the cream cheese until smooth. Add powdered sugar and vanilla extract, then gradually whip in the cold heavy cream until thick and fluffy.
- Step 7: Spread the cream filling evenly between the cooled cake layers. Chill the assembled cake before slicing for the best results.
Tips & Variations
- Always use smooth, seedless blackberry purée for a soft and clean cake texture.
- Room-temperature eggs and cream cheese blend better and help create a tender crumb and silky filling.
- For extra fruit flavor, spread a thin layer of blackberry jam between the layers before adding cream filling.
- Add fresh blackberries on top or between layers for texture and visual appeal.
- For a dramatic finish, decorate with dark chocolate shavings or a light dusting of cocoa powder.
- If you prefer a sweeter cake, dust with powdered sugar or drizzle a simple vanilla glaze over the top.
Storage
Store the assembled cake covered in the refrigerator for up to 3 days. The cream filling will stay fresh and firm when chilled, and the flavors will continue to develop. For best texture, let slices sit at room temperature for 15–20 minutes before serving. If storing unassembled cake layers, wrap them tightly; keep at room temperature for 1 day or refrigerate for up to 2 days. You can also freeze the layers for up to 2 months—thaw overnight in the fridge before assembling. Reheating is not recommended, as it may affect the cream filling and texture.
How to Serve
Serve this delicious recipe with your favorite sides.
FAQs
Can I use frozen blackberries?
Yes. Thaw them completely and strain well to remove excess liquid and seeds before making the purée to ensure a smooth texture.
Does this cake need food coloring?
No. The natural blackberry purée provides a beautiful deep, rich color, eliminating the need for artificial coloring.
Can I make this cake ahead of time?
Absolutely. You can assemble the cake a day in advance and keep it refrigerated to allow flavors to meld.
Can I use a different pan size?
Yes, but baking time may vary. Always check for doneness by inserting a toothpick into the center; it should come out with a few moist crumbs.
Print
Blackberry Velvet Cake Recipe
- Total Time: 1 hour 50 minutes
- Yield: 10–12 servings 1x
Description
A rich blackberry velvet cake featuring a deep berry color, soft velvet crumb, and a smooth, lush cream cheese filling. This elegant and moist cake balances sweet and tangy blackberry flavors with subtle cocoa undertones, making it a standout dessert perfect for celebrations or special occasions.
Ingredients
For the Blackberry Velvet Cake Layers
- 2½ cups (310 g) all-purpose flour
- 1½ cups (300 g) granulated sugar
- 2 tbsp unsweetened cocoa powder
- 1 tsp baking soda
- ½ tsp salt
- 1 cup (240 ml) neutral oil
- 1 cup (240 ml) buttermilk (or milk + 1 tbsp lemon juice)
- 2 large eggs, room temperature
- 1 cup (240 ml) seedless blackberry purée (strained)
- 1 tsp vanilla extract
For the Lush Cream Filling
- 8 oz (225 g) cream cheese, softened
- 1 cup (240 ml) heavy whipping cream, cold
- ½ cup (60 g) powdered sugar
- 1 tsp vanilla extract
Instructions
- Prepare the oven and pans: Preheat your oven to 350°F (175°C). Grease and line two 8-inch round cake pans with parchment paper for easy removal and clean edges.
- Mix dry ingredients: In a large bowl, whisk together the all-purpose flour, granulated sugar, unsweetened cocoa powder, baking soda, and salt until well combined.
- Mix wet ingredients: In a separate bowl, whisk the neutral oil, buttermilk, eggs, seedless blackberry purée, and vanilla extract until smooth and fully incorporated.
- Combine and bake: Pour the wet ingredients into the bowl with the dry ingredients and gently mix until just combined, being careful not to overmix to maintain a light crumb. Divide the batter evenly between the prepared pans. Bake for 28 to 32 minutes or until a toothpick inserted into the center comes out clean or with a few moist crumbs. Let the cakes cool completely in the pans.
- Make the cream filling: Beat the softened cream cheese with the powdered sugar and vanilla extract until smooth. Gradually whip in the cold heavy cream at low speed, increasing to high, until the filling becomes thick and fluffy.
- Assemble: Spread the lush cream filling evenly over one cooled cake layer, then top with the second layer. Chill the assembled cake in the refrigerator for at least one hour before slicing to allow the layers to set and enhance the flavors.
Notes
- Always use smooth, seedless blackberry purée to ensure a soft crumb without seeds.
- Chill the assembled cake before slicing to achieve clean, professional-looking layers.
- Let cake slices sit at room temperature for 15–20 minutes before serving for optimal texture and flavor.
- Prep Time: 20 minutes
- Cook Time: 30 minutes
- Category: Cakes
- Method: Baking
- Cuisine: American
Keywords: blackberry cake, velvet cake, cream cheese filling, gothic cake, blackberry velvet cake, moist cake, berry dessert, elegant cake