
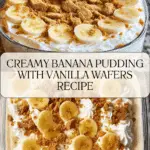
Creamy Banana Pudding with Vanilla Wafers Recipe
“`html
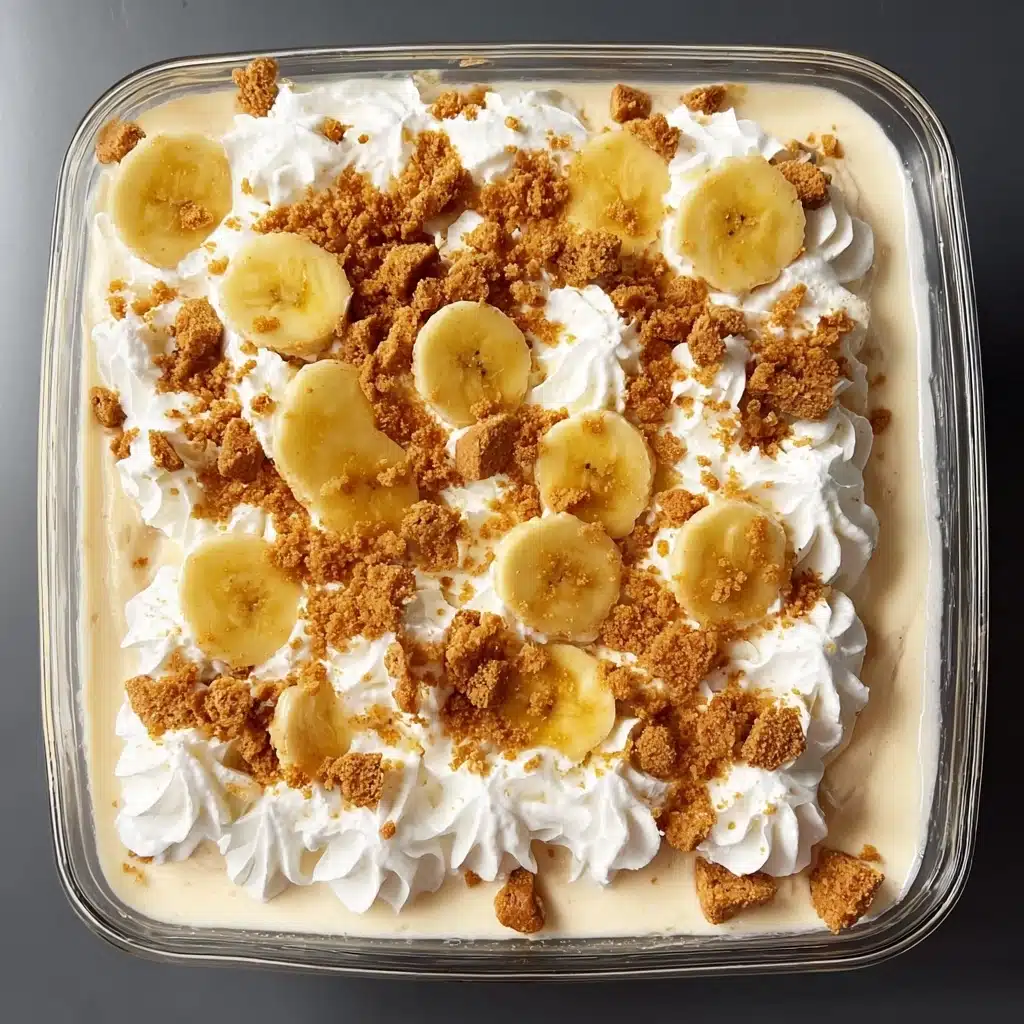
If you’re on the hunt for a dessert that feels like a warm hug in every bite, look no further—the best banana pudding ever is here to become your new favorite. This dessert shines brightest when you arrange a single layer of vanilla wafers to cover the bottom of the dish, setting the foundation for creamy pudding, ripe bananas, and that perfect soft yet crisp texture you crave. Every spoonful is a delightful mix of smoothness, sweetness, and a hint of crunch that simply melts in your mouth. Trust me, once you try this banana pudding, it will be on repeat for gatherings, cozy nights, or any moment that deserves a special treat.

Ingredients You’ll Need
The magic of this banana pudding is in its simplicity—each ingredient is thoughtfully chosen to create the perfect harmony of flavor and texture. From the sweet vanilla wafers to the luscious whipped topping, every element plays a key role in building layers of irresistible goodness.
- 1 box (5.1 oz) instant vanilla pudding mix: Provides the creamy, smooth base that sets quickly and tastes amazing.
- 2 cups cold milk: Essential for whisking with the pudding mix to get that velvety consistency.
- 1 can (14 oz) sweetened condensed milk: Adds rich sweetness and contributes to the pudding’s luxurious texture.
- 1 tablespoon vanilla extract: Enhances the flavors, giving the pudding a warm, aromatic vanilla note.
- 1 container (8 oz) whipped topping, thawed: Folded in to add lightness and fluffiness, making the pudding so dreamy.
- 1 box (12 oz) vanilla wafers: The crispy, buttery wafers create the iconic layers that soak up pudding while still holding their shape.
- 5–6 ripe bananas, sliced: Fresh bananas bring natural sweetness and a tender, fruity counterpoint to the creamy layers.
How to Make Creamy Banana Pudding with Vanilla Wafers Recipe
Step 1: Prepare the Pudding Mixture
Start by whisking the instant vanilla pudding mix with cold milk in a large bowl. Give it a good 2 minutes of vigorous mixing until the mixture starts thickening and looks beautifully smooth. This is your luscious base that will marry perfectly with sweetened condensed milk and vanilla extract in the next step, ensuring your pudding is extra rich and flavorful.
Step 2: Add Sweetness and Flavor
Slowly fold the sweetened condensed milk and the vanilla extract into your pudding mixture. Stir carefully so everything combines evenly without losing the lovely texture you just created. This step is all about enhancing sweetness and infusing that unmistakable vanilla punch that makes the banana pudding irresistibly good.
Step 3: Fold in the Whipped Topping
Now, gently fold in the thawed whipped topping. Use a spatula with a light hand to keep the airiness intact, ensuring your pudding stays fluffy and light rather than dense. This adds a cloud-like softness that contrasts perfectly with the layers of vanilla wafers and bananas.
Step 4: Layer Your Ingredients
This is the moment where things start to look like the dessert you love. First, arrange a single layer of vanilla wafers to cover the bottom of the dish. This wafer layer is crucial because it forms a sturdy yet tender base that absorbs flavor while giving texture. Next, evenly layer sliced bananas on top of the wafers, then spoon half of the pudding mixture over the bananas. Smooth it gently with your spatula.
Step 5: Repeat the Layers
Once your first layers are set, repeat the process: arrange a single layer of vanilla wafers to cover the bottom of the dish (or in this case, to cover the pudding layer above), followed by another layer of banana slices. Finally, pour the remaining pudding mixture over the top and smooth it out. For a bit of extra crunch and charm, crush a few additional vanilla wafers and sprinkle them over the dessert.
Step 6: Chill to Perfection
Cover your masterpiece with plastic wrap and pop it in the refrigerator for at least 4 hours, ideally overnight. This resting time lets all those delicious layers meld together, allowing the wafers to soften just enough without losing their gentle bite. This chill time is the secret to getting the perfect, spoonable banana pudding texture.
How to Serve Creamy Banana Pudding with Vanilla Wafers Recipe
Garnishes
When it comes to garnishing, simplicity is best. A few crushed vanilla wafers scattered on top add a lovely crunchy texture that contrasts beautifully with the creamy pudding. For a hint of color and extra flavor, consider adding a few thin banana slices or even a sprinkle of cinnamon to finish things off.
Side Dishes
Although this banana pudding stands gloriously on its own, pairing it with fresh berries or a light, tangy fruit salad can add refreshing balance. A cup of strong coffee or a glass of cold milk complement the dessert perfectly, making every bite feel cozy and indulgent.
Creative Ways to Present
Want to impress your guests? Serve individual banana puddings in clear glass jars or pretty dessert cups so all those gorgeous layers show through. You can also layer it in small trifle bowls or mason jars. If you’re feeling festive, top with edible flowers or a drizzle of caramel sauce to elevate your presentation to wow-worthy status.
Make Ahead and Storage
Storing Leftovers
Banana pudding tastes even better the next day, so any leftovers should be covered tightly and stored in the refrigerator. It will keep for about 2 to 3 days, allowing the flavors to deepen as the layers mingle.
Freezing
While freezing banana pudding isn’t usually recommended because fresh bananas change texture, you can freeze the pudding mixture itself (before layering) for future use. When ready, thaw it in the fridge and then assemble the dessert fresh with new bananas and wafers for best quality.
Reheating
This dessert is best enjoyed cold and doesn’t require reheating. If you prefer it slightly less chilled after storage, let it sit at room temperature for about 20 minutes before serving to soften the pudding layers just a bit.
FAQs
Can I use homemade vanilla pudding instead of instant?
Absolutely! Homemade vanilla pudding works beautifully if you want a more natural touch. Just ensure it has a thick consistency so it supports the layers well when you arrange a single layer of vanilla wafers to cover the bottom of the dish.
What type of bananas should I use?
Ripe but firm bananas are ideal. They should be yellow with just a few brown spots for natural sweetness and a pleasant texture that holds up well in the layered pudding.
Is it possible to make this dessert vegan?
Yes, you can substitute plant-based milk, a vegan vanilla pudding mix, and dairy-free whipped topping to make a vegan version. Just choose vegan-friendly vanilla wafers or cookies to keep that signature crunch.
Can I prepare this dessert ahead of time for a party?
Definitely! This dessert benefits from resting in the fridge overnight, so preparing it a day ahead will save you time and improve the flavor and texture.
Why is it important to arrange a single layer of vanilla wafers to cover the bottom of the dish?
That first layer of vanilla wafers creates the perfect base for soaking up pudding and balancing the softness of the bananas. It gives your dessert the classic texture and structure that makes banana pudding so beloved.
Final Thoughts
Trust me, once you master how to arrange a single layer of vanilla wafers to cover the bottom of the dish and build these luscious layers, this banana pudding will quickly become your go-to dessert. It’s creamy, dreamy, and filled with comforting flavors that bring smiles to the table every time. So why not dive in and start layering up some happiness right now?
“`
Print
Creamy Banana Pudding with Vanilla Wafers Recipe
- Total Time: 4 hours 15 minutes
- Yield: 8–10 servings 1x
- Diet: Vegetarian
Description
This recipe for The Best Banana Pudding Ever is a creamy, luscious layered dessert featuring vanilla pudding, ripe bananas, and crunchy vanilla wafers. It’s easy to prepare and perfect for gatherings or a comforting treat. The blend of smooth pudding, fresh bananas, and crispy wafers creates a delightful combination that melts in your mouth.
Ingredients
Pudding Mixture
- 1 box (5.1 oz) instant vanilla pudding mix
- 2 cups cold milk
- 1 can (14 oz) sweetened condensed milk
- 1 tablespoon vanilla extract
- 1 container (8 oz) whipped topping, thawed
Layers
- 1 box (12 oz) vanilla wafers
- 5–6 ripe bananas, sliced
Instructions
- Prepare Baking Dish: Set out a 9×13 inch baking dish nearby as your workspace for assembling the layers of this dessert.
- Mix Pudding: In a large mixing bowl, whisk the instant vanilla pudding mix with cold milk vigorously for about 2 minutes until the mixture thickens and starts to set.
- Add Condensed Milk and Vanilla: Stir in the sweetened condensed milk and vanilla extract until the pudding mixture is smooth and fully combined.
- Fold in Whipped Topping: Gently incorporate the thawed whipped topping using a spatula, mixing carefully to keep the mixture light and fluffy.
- Layer Wafers: Arrange a single layer of vanilla wafers to cover the bottom of the baking dish evenly.
- Layer Bananas: Place a layer of sliced bananas over the wafers, ensuring good coverage.
- Layer Pudding: Spoon half of the pudding mixture evenly over the banana layer, smoothing gently with the spatula.
- Repeat Layers: Add another layer of vanilla wafers on top of the pudding, followed by another layer of banana slices.
- Top with Remaining Pudding: Pour the remaining pudding mixture over the bananas, then smooth the surface with a spatula for an even finish.
- Garnish: Crush a few additional vanilla wafers and sprinkle them over the top for added texture and decoration.
- Chill: Cover the baking dish with plastic wrap and refrigerate for at least 4 hours, preferably overnight, to let the flavors meld and wafers soften perfectly.
Notes
- Use ripe but firm bananas to prevent mushiness in the pudding.
- For a richer taste, substitute half the cold milk with cream.
- The dessert can be made a day ahead, as chilling overnight enhances flavor and texture.
- To keep the pudding from becoming too watery, avoid over-slicing the bananas too thin.
- Leftovers should be covered and refrigerated; consume within 3 days for best quality.
- Prep Time: 15 minutes
- Cook Time: 0 minutes
- Category: Dessert
- Method: No-bake, Layered Dessert
- Cuisine: American
Nutrition
- Serving Size: 1 cup (approximate)
- Calories: 310
- Sugar: 32g
- Sodium: 180mg
- Fat: 9g
- Saturated Fat: 5g
- Unsaturated Fat: 3g
- Trans Fat: 0g
- Carbohydrates: 54g
- Fiber: 2g
- Protein: 4g
- Cholesterol: 15mg
Keywords: banana pudding, layered dessert, vanilla wafers, easy banana dessert, no-bake dessert